Showing posts with label cheese. Show all posts

Thursday, May 16, 2013

Spinach Ravioli Stuffed w/ Crab & Ricotta


So I've been a little sparse in the posting lately.  Life has caught up with me and I just haven't had the time to sit down and blog. 

House hunting has become somewhat of a bust - between finding the right home and dealing with the bank... it just doesn't look like it'll be a possibility until the end of the year.  It bums out Andy more than it does me, but it's still a kick in the butt when we had our hopes so high up.

I hesitated to start the garden up this year because we thought we'd have bought a home by now, but it looks like I'll have time to plant one here after all.  I'm doing something different this year, too.  I'm trying the whole "urban gardening" method - growing everything in big planters on our back deck.  I've got one big pot for potatoes, and several medium-sized for bell peppers, tomatoes, and an array of herbs.  I'll keep you guys updated on how that all goes!

I had a bunch of spare time yesterday so I decided to take the time to roll out some fresh pasta.  Ravioli is one of the easiest things and the possibilities for stuffing are endless.  I had a ton left over and ended up freezing them - definitely will make for quick and easy meals later on!

Ingredients:

Spinach Pasta Dough:

3 eggs
2 teaspoons olive oil
1 teaspoon salt
8 oz. bread flour, plus more, if needed (you can use a combination or substitution of semolina, but I find it makes the dough harder to work with afterwards, and most people are more apt to have bread flour in their pantry than semolina)
4 oz. blanched spinach, pureed

Crab Filling:

4 oz. lump or claw crab meat
2 tablespoons parsley, chopped
8 oz. ricotta
1 egg
salt and pepper, to taste
 
Parmesan Cream Sauce:

5-6 sprigs thyme
3-4 cloves garlic, smashed
1 tablespoon olive oil
1 1/2 cups heavy cream
1 cup parmesan cheese, shredded
salt and pepper, to taste

In the bowl of a mixer with the paddle attachment, combine the eggs, olive oil, salt, and pureed spinach.  Add about a third of the flour and mix until combined.  Switch to the dough hook attachment and continue adding flour until the dough is dry and cannot absorb any more flour (you may need more than the recipe says - I did).

Remove the dough from the bowl and wrap in plastic wrap.  Let sit at room temperature for about 30 minutes.

Meanwhile, you can make your filling.  In a food processor, combine the crab meat, parsley, ricotta, and egg.  Mix until combined and season with salt and pepper, to taste.  Keep in the refrigerator until needed.

After the dough has rested, unwrap and cut into fourths.  Using one section at a time (make sure to cover the other sections so they don't dry out), roll out with a pasta machine or rolling pin (I keep it old school and do this).  You'll want the dough to be as thin as possible, but still pliable enough to work with.  Make sure to have some extra flour handy for dusting so the pasta doesn't stick to your machine or cutting board.

Using a round biscuit cutter (I used a 2" diameter round) or ravioli press, cut out an even amount of ravioli shapes. 

Pair up the rounds, one round will have filling (the bottom), one will be the topper.  Place about a tablespoon or so of filling on each bottom round (this will vary depending on the size of your ravioli) - you'll want a decent amount of space around the filling. 

Using a pastry brush, brush some warm water around the edges of the bottom round.  Place the top round on top of the filling, and sealing the edges.  Make sure to press around the filling so there are no air pockets.

Continue until all of the dough is used up.

Place ravioli on a baking sheet dusted with flour and place in the refrigerator for at least 15 minutes.
You can also freeze the raviolis at this point for use later.

When you're ready to cook these guys, bring a large pot of salted water to a boil.  Add the raviolis and cook for about 3-5 minutes, or until the pasta is just cooked.  Fresh pasta most always takes less time to cook than dried.  Drain and add into the sauce, or reserve and pour sauce over top.

To make the sauce, just add the olive oil to a medium saute pan under medium high heat.  Add the garlic and thyme and cook until fragrant, about a minute or so.  Add the cream to the pan and reduce until thickened.  Stir in the parmesan cheese until melted.  Season with salt and pepper, to taste.  You can add the raviolis to the sauce at this point or pour the sauce over top of the raviolis - whichever you prefer!

And voila - homemade pasta at it's finest.  Definitely easy and worth the little bit of extra effort!


Hope you guys have a great rest of the week!


Wednesday, December 12, 2012

Spinach Souffle

I've obviously been on an egg kick, lately.  I don't know why, but I'm all about the little protein powerhouse.  Maybe because it's such a cheap commodity.  So easy to manipulate and do different things with?  Who knows. 


And I've never tried making a souffle before.  With a little extra time on my hands now that school is over for the quarter, I have time to conquer the unconquered.  I don't think I've mastered it, by any means.  But for a first attempt, I think they turned out rather nicely!

Ingredients:

1 tablespoon olive oil
1 small shallot, minced
1 cup raw spinach, roughly chopped
3 tablespoons unsalted butter
3 tablespoons flour
1 cup milk
salt and pepper, to taste
pinch of cayenne pepper
pinch of nutmeg
4 egg yolks
4 egg whites
1/2 cup Emmentaler (Swiss) cheese, grated

Preheat oven to 400 F.

Heat a medium skillet under medium high heat.  Add olive oil and heat until shimmering.  Add shallot and cook for about 1-2 minutes, or until fragrant.  Stir in spinach and cook until wilted.  Season with salt and pepper, to taste.  Set aside to cool.

A lot of souffle bases don't require a bechamel, but I think it makes the souffle creamier and more delicate in the long run, so I highly recommend it.  In a medium saucepan, melt the butter.  Whisk in the flour and cook for just a few minutes, or until the flour is a light blond color.  Stir in milk, a little at a time, whisking constantly to avoid lumps.  Stir until all milk is incorporated and mixture is smooth.  Whisk in the cayenne pepper, nutmeg, and season with salt and pepper.  Bring to a boil and let simmer, whisking occasionally, for about 3-4 minutes, or until mixture is slightly thickened.  Take mixture off of heat and whisk in egg yolks, one at a time.  Transfer to a medium bowl and set aside.

In a medium bowl, beat the egg whites with a pinch of salt until they are at stiff white peaks (think meringue).  Fold in about 1/4 of the egg white mixture into the egg yolk mixture, along with 1/2 of the cheese and the spinach mixture.  Fold in the rest of the egg whites.

Grease one large souffle dish or 4 mini ramekins (I had 4 inch diameter ones that made perfect side dishes).  Sprinkle inside of souffle dish or ramekins with a little bit of cheese.  Turn out mixture into prepared dishes and sprinkle with remaining bits of cheese. 

Place dish(es) in oven and turn heat down to 375 F.  Bake for about 25 minutes or until souffles are risen and golden brown on top.

Carefully take out of oven and admire your accomplishment!

I had a little bit of a deflation in one of my souffles, but that's expected with any first try, right?  Right.  But the result was an airy, creamy spinach souffle that won over Andy (who, I could tell, was a bit skeptical of having souffle as part of our dinner). 


Have you ever made a souffle?  How did your first go at it go?

Sunday, December 9, 2012

Spinach Omelette


With the close of another quarter of school, I'm one step closer to finishing!  I get to do my internship during my last lab (which happens to be next quarter) and I couldn't be more excited!  But I'm also excited about the much needed break until the new year.

It's been hard to have differing schedules with Andy.  He's a nine-to-fiver and I'm a 3-midnight kind of gal.  But we make it work.  We have lunch dates.  He takes days off (apparently he's got tons of vacation days that he needs to take).  We make time for each other and I'm thankful for that.

So when time is limited, meals end up being quick and easy.  So I've been on an egg kick.  Omelets used to be my go-to meal when I lived with my parents.  My favorite combination?  Hot dogs and cheddar.  I know - weird.  My omelet preferences have since become more "adult" in nature over the years, but I still revert to the classic every now and then.  Don't hate.

What's your favorite omelet combination?

Ingredients:

2 eggs
1 cup raw spinach, stems removed
2 tablespoons milk
1 tablespoon dijon mustard
1/4 cup mozzarella cheese, shredded 
salt and pepper, to taste
2 tablespoon unsalted butter, divided
hot sauce (optional)

Heat a medium skillet under medium high heat.  Melt 1 tablespoon of the butter in the pan and add the spinach along with a big pinch of salt and pepper.  Stir the spinach constantly until it wilts (the stirring creates steam which causes it to spinach to wilt faster than if you were to just leave it alone).  Remove from heat and place in a medium bowl to cool.

Once the spinach is at room temperature, add eggs, milk, dijon mustard, and cheese to the bowl.  Whisk until well mixed.

In a medium nonstick skillet, melt the butter under medium heat.  Pour in egg mixture and cook until the bottom and edges are set, with the top and middle still liquid.  Now this is where people differ in their omelet-making.  Some people fold both sides inward.  Some people roll.  Some people just fold one side over.  You can do whatever you fancy!  I tend to gravitate toward just folding one side over.  It's easier than the other two, and if you mess us, it's easy to make it look like an omelet after some quick damage control.  But feel free to take on whatever omelet construction you deem fit.

So fold accordingly and cook just until egg on the inside is just cooked through.  It should still be light and delicate on the inside.


Serve with hot sauce and you're in business!

Hope you guys enjoy the last day of the weekend and have a great start to your week!


Wednesday, December 5, 2012

Gratin-style Shirred Eggs


"One egg or two?"

"Is that all you're making?  That's not a meal."

I beg to differ, dear.  That's the exact conversation my husband and I had when I decided to make these.  Eggs are a nutrition powerhouse and I do, in fact, think that eggs alone constitute as a meal! 

Shirred eggs are simply ones cooked in a small buttered dish (such as a shallow ramekin) and finished off under the broiler.  The result is a softly set white and liquid yolk.  Everybody knows the perfect egg has a runny yolk! 

Some people find the process tricky, but once you get the hang of it, you'll have soft, delicate eggs every time! 

We doll these shirred eggs up with the addition of cream and some cheese. 

Ingredients:

1/2 tablespoons unsalted butter
4 eggs
salt and pepper, to taste
2 tablespoons heavy whipping cream
2 tablespoons mozzarella cheese (any cheese will do, this is just what I had on hand)

Heat broiler to high.

Divide the butter between two small, shallow, fire-proof ramekins (about 4 inches in diameter).

Place dishes over moderate heat (it helps to have a gas range - if not, then I'd just throw them under the broiler to begin with).  Once butter is melted, add 2 eggs to each dish.  Cook for about 1-2 minutes, or until a thin layer of the white is set on bottom.

Add 1 tablespoon of whipping cream to each dish and top with mozzarella cheese.

Transfer dish under broiler and cook until white is softly set, and yolk is still runny, about 5-6 minutes. 

You'll end up with two perfectly runny eggs and some nicely browned cheese.  Plenty enough for a protein-packed breakfast!


Hope you guys have a great rest of the week - I might be absent for the rest of it - it's a big, busy week at school and work!

Monday, May 28, 2012

BBQ Chicken Quiche


Happy Memorial Day everybody!  Andy and I are both off of work and school today so it's just a free day to do whatever we want!  We've decided to take the dogs with us to Clifty Falls to do some hiking, then come back to grill out some steaks and make some sushi.  Sounds like a good way to spend the day to me!

Since BBQ is the main attraction in many households across the nation today, I figured I'd do a little twist on a classic quiche.


Ingredients:

Rotisserie chicken, meat taken off the bone and shredded
1 cup of your favorite BBQ sauce
1 pie shell (you can use your leftover puck from the pie dough recipe)
4 eggs
2 cups milk
1/2 cup heavy cream
salt and pepper, to taste
pinch of nutmeg
1/4 cup cheddar jack cheese, shredded

Preheat oven to 375 F.

If you haven't already, blind-bake your pie shell until slightly golden.  Let cool to room temperature before adding filling.

Make the quiche custard by combining the eggs, milk, heavy cream, salt, pepper, and nutmeg in a large bowl.  Whisk until mixed well.  You can also strain the mixture at this point to remove any "egg boogers".  Yes, that's my technical term.  You know, those pieces of egg white that just won't homogenize with the rest of the mixture?  You'll end up getting a more evenly colored quiche this way, instead of random white spots here and there - but if that's your thing, then hey, you can skip the straining.

Anyway, in a separate bowl, combine the shredded chicken and BBQ sauce.  Mix well and season with salt and pepper, to taste.

Place about 1/2 to 1 cup of the chicken on the bottom layer of the pie shell.  More than likely, you'll have more filling than you know what to do with - but I'm sure you're creative enough to come up with something to do with it (i.e. bbq pulled chicken sandwiches, bbq chicken pizza, ANOTHER quiche, etc.).

Pour the custard atop the chicken and then top the whole thing with the shredded cheese.

Bake for 45 minutes or until quiche is set, but still slightly jiggles in the center.  Let cool to room temperature before slicing (unless you just can't wait that long!).

Hope everyone has a safe and happy Memorial Day!

Friday, March 9, 2012

Country Ham & Manchego-Stuffed Chicken Breasts


Howdy!

The wedding countdown is on.  Less than 2 months away, we're starting to chip at what we have left to  do bit by bit.  The past week or so, my engagement ring has been at the jeweler's in order to get the bands molded.  I almost feel naked without it!  Like men are just gawking at me like I'm a single woman.  Hehe, I'm pretty vain aren't I?

The end of this quarter of Culinary School is almost upon us.  And I'm definitely ready for the break.  The middle of the month is also my last day at my day job at the pharmacy.  I've worked there for 7 years and it'll be hard to say good-bye.  But I know I've been lifelong friends and it won't be good-bye to those people.  But it also marks the day I'll be moving on.  Really getting on.  I'll be able to work at the restaurant more, especially since I'll be switching to Day-time classes for the next quarter.  Nights and weekends were alright, but I'd be there double the time.  Day-time classes allow me to finished faster (and cook more!) - as well as being able to work at the restaurant more often. 

But all in all, everything is great - except for the fact I've cut myself twice in the past two weeks.  Once on my pinky (sliced the sucker right open) while cleaning my knife - and the second time was just this past Sunday at work - with a bread knife.  Not pretty.  And by the time I went to the Immediate Care Center (my stubborn ass went the next day instead of right after work), it was too late to get stitched up.  So I'll just have to suffer with the battle wounds for now.

Anyway, this is an easy weeknight dinner that's tasty and quick!  Let's get at it!

Ingredients:

2 chicken breasts, boneless and skinless
2 pieces of country ham
2 slices of manchego cheese (or cheese of your choice)
1/4 cup flour
salt and pepper, to taste
2 tablespoons grapeseed oil (or olive oil)

Preheat oven to 375 F.

Wrap your chicken breasts loosely in plastic wrap.  You want it loose enough that they'll be able to comfortably expand, but not too loose that they're "expand" in little pieces all over your kitchen when you smack the crap out of them.


Take a meat mallet or bottom side of a pan and get to smacking.  Flatten the breasts to about 1/4 to 1/2 inch thickness.


Remove plastic wrap from chicken breasts.


Place a piece of country ham on chicken breast.


Place a piece of manchego cheese on top of country ham.


Using butcher's twine or toothpicks (these are more ideal), wrap the chicken breast around the ham and cheese.  If I had toothpicks handy, I would have used those, but the twine sufficed.


Place the flour in a shallow dish.  Season with salt and pepper.  Dredge the chicken in the flour, shaking off any excess flour.


Heat the oil in an oven-proof skillet under medium high heat.  Place the chicken in the pan, seam-side up.  Cook chicken until you get a nice golden crust, about 3-4 minutes.  Flip chicken over and cook for an additional minute.

Transfer chicken to the oven to finish, about 10 minutes or until internal temperature reaches 165F.


Serve chicken with barbecue sauce (or sauce of your choice) and side of your choice.  We paired this with macaroni and cheese for a nice comforting meal!

Wednesday, August 31, 2011

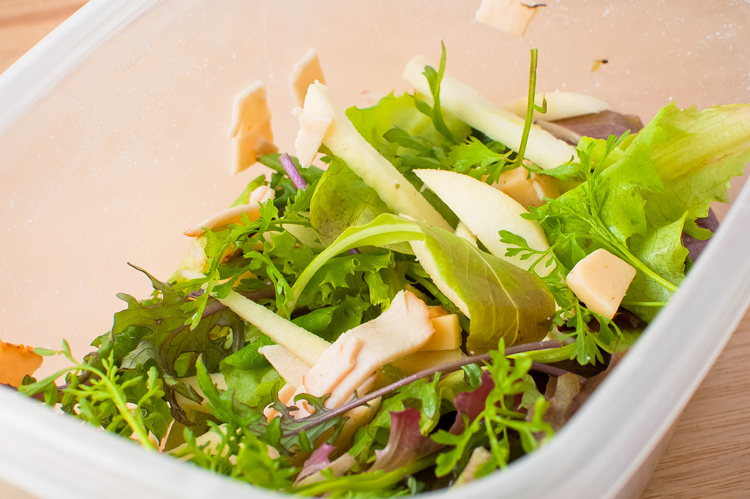
Mixed Greens w/ Apples & Smoked Gouda


I know I've been posting a lot of simple salads over the past few months - but I can't help it!  I love lunchin' on salads!

One of my favorite additions to salads are julienned apples - Granny Smiths to be exact.  Raise your hand if you agree!  They just give a welcomed and refreshing sour bite in the midst of some semi-bitter greens.

Happy mid-week to ya guys and just remember - 2 more days and it's a 3 day weekend (for those of us in the US that is!).


Ingredients:


Mixed greens
1/2 cup Smoked gouda, cut into 1/2 inch cubes
Granny Smith apple, peeled and julienned
1/4 cup deli turkey, chopped

In a large bowl combine greens, gouda, apple, and turkey.  Serve plain or dressed with your favorite dressing!

Simple right?  Right. 


I promise I'll start posting "harder" recipes soon!  Stay tuned tomorrow for my review of our Danville, KY tasting and a meet-up with other KY Food Bloggers!  Have a great rest of your Wednesday guys!

Thursday, August 25, 2011

Zucchini Frittata


Good morning! 

I woke up with a killer cramp in my calf this morning, so I'm slowly limping around the house.  As time passes, it seems to be getting better... but it doesn't look like I'll be getting my run in today.  I figure I better let it rest up and I'll get back at it Saturday.

I'm pretty stoked today because I get to take a little roadtrip to Danville, KY to meet up with a few other Kentucky Food Bloggers.  We're doing a tasting of a few restaurants tonight and I'm really excited to actually meet these awesome bloggers in person.  I'll definitely post pictures and a review of the experience next week!

I made this frittata when we had tons of zucchini from our CSA.  It was quick, easy, and my only complaint... I used too big of a pan, so it looks rather thin (and more like an omelette) than an actual frittata.  Oh well, it still tasted mighty good!

Ingredients:


1 tablespoon olive oil
2 zucchini, chopped
salt and pepper, to taste
6 eggs
1 cup cheddar cheese, shredded
1/4 cup milk

In a medium skillet under medium high heat, add about 1 & 1/2 teaspoons olive oil.  Add zucchini and saute until starting to brown, about 5-7 minutes.  Season with salt and pepper.  Remove zucchini and set aside.

In a medium bowl, beat the eggs and milk together.  Season with salt and pepper.  Heat a non-stick skillet under medium low heat and add remaining 1 & 1/2 teaspoons of olive oil.  Coat pan with oil.

Pour the egg mixture into the pan and let cook until the egg starts to solidify, about 2-3 minutes.  Spread the zucchini over top of the eggs and top with cheddar cheese.  Cook for an additional 3 to 5 minutes, or until egg is cooked through and cheese is melted.

Slice and serve right away.

This was simple, delicious, and easy.  You could have it for breakfast, lunch, or dinner.  It's perfect for any time of day!  Feel free to swap out the ingredients for what you have, and add whatever you like!  Frittatas are versatile like that =)


Have a great Thursday guys!

Tuesday, August 23, 2011

Sausage & Peppers


Phew what a busy day it has been! 

I know it's crazy late, but you know me... had to get a post in.

After work today, I headed over to register for classes.  CULINARY SCHOOL CLASSES.  Oh yeah.  I don't think I've ever been so excited to receive a stack of textbooks and binders.  I think today it's really starting to sink in.  I'm actually going to culinary school.  I'm following a dream.  And it is awesome.

So now that I've gotten my excitement out of the way, let's talk food.

I recently received a package in the mail from the Foodbuzz Tastemaker's program to try a sample of an upcoming line of Birdseye Chef's Favorites.  They're a variety of side dishes that include Mushroom & Green Bean Risotto, Creamy Primavera Risotto, and Lightly Sauced Creamed Spinach. 


I paired the Mushroom & Green Bean Risotto with this sausage and peppers meal and it was okay.  It was a tad bit "mushroomy" for my taste - but I mean, it was Mushroom and Green Bean Risotto after all.  I tried the Creamy Primavera Risotto as well and I found it more appetizing.  My only real complaint was that the packaging said there were 2 servings per package.  Now, I don't know if Andy and I just expect big servings of things or what, but there was definitely only 1 feasible serving on the package.  But other than that, if you're looking for a quick side without the hours of labor - then this might be for you, so look out for it!

Now, these sausage and peppers are a different story.  Quick, easy, and tasty.  No complaints on this one!


Ingredients:

1 onion, chopped
1 purple bell pepper, sliced
1 jalapeño, seeded and chopped
1/4 cup diced tomatoes
1 cup mozzarella cheese, shredded
2 mild italian sausages, sliced
1 tablespoon olive oil
salt, to taste


Heat olive oil in a large skillet under medium to medium high heat.  Add onions, jalapeño, and bell pepper and sauté for about 5 minutes, or until starting to soften.  Season with salt.

Add sausage slices and cook until browned, about 5 to 7 minutes.

Stir in tomatoes and mozzarella cheese until heated through and cheese is melted.


This was definitely a winner in my book.  Almost doesn't even need a side dish accompanied with it.


Well, I'm off to bed.  Have an early morning at work again tomorrow!  See you all in the afternoon!


*I received a free sample of Birdseye Chef's Favorites through the Foodbuzz Tastemaker's Program.  All opinions shared in this post are my own.

Tuesday, June 14, 2011

Sauteed Kale w/ Polenta


We've been getting a lot of kale in our CSA lately.  I love kale and usually end up putting it in a soup (it's stellar in soups!), but with the weather being so hot - I just haven't been in the mood for any kind of soup.  Simple and easy is the route I like to take.

And when I saw this recipe on Eats Well With Others, I just knew I had to make it - especially since I'd never cooked with polenta before either.  It just seemed like the perfect opportunity!


Ingredients:
Adapted from Eats Well With Others' recipe


1 tablespoon olive oil
2 garlic cloves, thinly sliced
2 cups kale, chopped
salt and pepper, to taste
1 cup polenta
1/4 cup smoked gouda, shredded

In a large skillet, heat olive oil under medium high heat.  Add garlic and saute for about a minute or so, until fragrant.

Add the kale, salt, and pepper and saute for about 3-5 minutes, or until kale is slightly wilted, but still green.

Meanwhile, bring about 4 cups of salted water to a boil.  Slowly pour in polenta and stir constantly until thick - about 5 minutes or so.

Spoon some polenta on a plate and top with the kale.  Sprinkle some shredded gouda on top if you want too.


Joanne served this with some braised short ribs (which looks pretty darn awesome too!), but I found this a great dish all by itself.  It's elegant, easy, and super tasty!  And let's just say... this won't be the last time I cook with polenta, either!

Friday, April 15, 2011

Spicy Macaroni & Cheese


Happy Friday guys!  You don't even know how happy I am that the weekend is finally here!  It was a crazy week back at work - or maybe I'm just being a baby and wanted one more week (or a few) of vacation.  But such is life.  Bills need to be paid and my butt needs to work.  Regardless... the weekend is here.

Tomorrow should be plenty of fun.  It's Thunder Over Louisville and we'll be heading to Slugger Field for the Bats game and a permanent seat for all the fireworks festivities!  I should have some good pictures next week so look out for them!

Now let's talk macaroni.  Macaroni and cheese, to be exact.  There's so many different ways to make the mac, how does one choose a favorite?  Andy... he's a big fan of "the cheesier, the better" - and he makes a mean mac, that's for sure.  But he makes it on the stove, and that's all well and good - But me, I kind of like to spice things up.  Be unique.  I am a fan of baked macaroni and cheese.  You know, you get the crunch of the exterior noodles and then you have the underneath layers of smooth and creamy macaroni.  Definitely good stuff.

Something I don't like is dry macaroni and cheese.  You know, the baked ones that don't have any creaminess to them at all.  Just pretty much flavorless noodles that have cheese (that's not really gooey or creamy) just sort of stuck to the noodles.  Don't know what I mean?  Well... then you're lucky, and you go on eating your good and creamy mac!

How about you guys?  What your favorite way to make the mac?!?  I'd love new suggestions to try!

Ingredients:


12 oz. fusilli pasta
1/4 cup unsalted butter
5 large garlic cloves, minced and divided
1/4 cup flour
2 cups milk (I used 2%)
salt and pepper, to taste
1 & 1/2 cup sharp cheddar cheese, shredded
1 tablespoon sriracha sauce (more or less, depending on your preference)
1/4 teaspoon cayenne pepper
3 tablespoons olive oil
1 & 1/2 cups wheat bread, cut into small cubes (about 1/4 inch)

Preheat oven to 350 F.

Bring a large pot of water to a boil and cook pasta according to package directions (I did about 10-11 minutes).  Drain pasta well and return to pot.

Grease a large baking dish (9x13) and set aside.

In a large skillet, melt butter under medium high heat.  Stir in about 1 tablespoon of the minced garlic and cook until fragrant.  Whisk in flour and stir constantly for about a minute.  Then whisk in milk, and season roux with salt and pepper. 

Bring mixture to a boil, whisking constantly.  Stir in shredded cheddar cheese, sriracha, and cayenne pepper.

Pour mixture over pasta and mix well.  Spoon mixture into an even layer in the baking dish.

Wipe skillet clean (or use another one, but I like to keep the dishes to a minimum!) and heat under medium high heat.  Add olive oil to pan and heat until shimmering.  Add bread cubes and cook about 5-7 minutes, or until starting to brown.  Stir in remaining garlic during the last couple minutes of toasting bread to infuse a little bit more flavor.

Top pasta with garlicky bread crumbs and bake for about 30 minutes, or until top is golden brown and sauce is bubbling.


This is a perfect side dish to any spring/summer cookout, or you could be like us and just eat a big plateful for dinner!  I loved the garlicky crunch of the bread in contrast with the subtle heat of the macaroni and cheese.  Give this one a go if you're a macaroni and cheese aficionado like us!

Have a great weekend guys!

Monday, April 4, 2011

Shrimp Naan Pizzas


 Happy Monday guys!  How was everyone's weekend?!

We got a TON of work done, let me tell you.  I practically rearranged our bedroom this weekend, and I'm still not complete.  I got a couple of things to spice up the room (some artwork, flowers, etc.), so it looks like an actual bedroom, instead of a bare prison cell.  Will definitely have to post some before/after pictures tomorrow.

We're also preparing for some garden work!  We went to Lowe's (which was a madhouse!), and Andy did some mulching and yard work.  I'm planting my seeds indoors this week, and tilling up the rest of my garden bed outside, so hopefully everything will be ready for the end of this week or next.  It's so exciting having a garden!  And the spring weather is absolutely amazing too - although it's raining a tad today.

Oh, and yeah, I'm on VACATION!  It's amazing, and kind of sad having to still go to class this week, but at least that's only 2 hours out of the day for 3 days.  I can live with that.

So on to today's recipe.  Last week's naan was a big hit with you guys and I'm glad!  And the whole reason I made the naan, was so that I could make these pizzas, from the same blog (Food For My Family) that I got the naan recipe from.  If you haven't checked out Food For My Family, I highly suggest you do!  It's full of awesome goodies, definitely kid friendly too!

Ingredients:
Adapted from Food For My Family's recipe


2 tablespoons olive oil
5 cloves garlic, minced
2 pieces of naan bread
about 12 pieces of rock shrimp, cleaned
1/2 cup pecorino romano cheese, grated
1/2 cup parmesan, grated
1 teaspoon dried parsley

Preheat oven to 400F.

In a small bowl, combine olive oil and garlic.  Mix well and let sit for about 10 minutes, in order to let the flavors infuse in the oil.

Lay out naan on a baking sheet and spread about a tablespoon of the olive oil mixture on each piece.  Top each piece of naan with about 6-7 rock shrimps.  Sprinkle about 1/4 cup each of pecorino romano and parmesan on each piece, as well.  Divide the dried parsley among the two pieces of naan, also.

Bake pizzas for about 10 minutes, or until shrimp is cooked through and cheese is melted.  Let sit for about 5 minutes, to cool, and then slice into pieces.


This is a perfect appetizer for dinner parties, or if you don't want to share, you can easily eat the whole thing for a light lunch - which is what I did.  Yes, I'm selfish.  And I'm proud. =)  But I'm sharing with you... so now we're even, right?

Enjoy your Monday guys!  I know I'll be doing some homework (which I should have done this weekend!) and some more cleaning/gardening!

Monday, March 28, 2011

Restaurant Recreations: Fiesta Time Mexican Grill

Happy Monday guys!  Hope everyone had a great weekend.  I know we did!  It was Andy's first official weekend off and he says it felt great!  He's already been told after his 1st week at the new job that he's doing a great job, so he's in high spirits!  I'm still so proud of my little grown up! =)

Anyway, it's been a while since I've done a review so I thought I'd take a crack at it.

On the outside, Fiesta Time in Oldham County looks likes any old Mexican restaurant.  Beer and tequila neon signs filling the windows,  sombreros a-plenty, and margaritas in every corner.  As traditional as it gets, right?  Well, that's what I thought going in anyway.

We walked in at a decent hour, maybe 8:30ish.  The servers seemed to "rush" us a little bit.  The sign on the door said they close at 11pm so I didn't understand why that was happening.  But we continued on, blindly.

We ordered the typical Mexican fare, Andy getting some fajita quesadilla of some sort and I opted for the Combo #2 (a taco, an enchilada, and a chalupa).  We also ordered some nachos for an appetizer and it was just a little lack-luster to even get into.

So what about our food?  I think we were so famished we ate it with no complaints.  But looking back, I have a few key points:

- Not all Mexican restaurants are the same - and Fiesta Time proves it... and not in a good way
- I could have made this at home.
- I did make this at home... and it was 100x more delicious.

Honestly, I wasn't impressed.  Andy's fajita quesadilla was unimpressive (although he seems to disagree and said it was pretty good, but maybe I'm just a snob), and my combo, was well... let's just say I've had better things at Taco Bell (I know, I know - that was harsh).

Bad cell phone pictures irk me - so I apologize.
Fiesta Time Mexican Grille on Urbanspoon
So, first thing I set out to do?  Recreate this sucker!  So let's see how it went...


Ingredients:


Tacos:

1 tablespoon olive oil
1 onion, minced
3 garlic cloves, minced
1 tablespoon chili powder
1 teaspoon cumin
1 teaspoon coriander
1/2 teaspoon oregano
1/4 teaspoon cayenne pepper
salt and pepper, to taste
1 lb. shredded chicken & beef (I had leftover grilled meats from this meal)
1/2 cup tomato sauce
1/2 cup chicken broth
2 teaspoon apple cider vinegar
1 teaspoon dark brown sugar
soft tortillas, warmed

Enchiladas:

1 cup salsa verde
1/2 cup cheddar cheese, shredded
1/2 cup pepperjack cheese, shredded
5-6 soft tortillas

Chalupas:

1 cup masa harina flour
1/2 cup water
vegetable oil, for frying
Filling from tacos, above
sour cream, optional

For the taco filling, heat a large skillet under medium high heat and add olive oil.  Saute onion until soft and translucent, about 5 minutes or so.  Add in garlic, chili powder, cumin, coriander, oregano, cayenne, salt, and pepper.  Stir until fragrant, about a minute.

Stir in the shredded chicken and beef (you could definitely just use a pound of ground beef if you wanted, but I had all those leftovers, I couldn't let them go to waste).  Heat until warmed, about 4-5 minutes.

Add in tomato sauce, chicken broth, apple cider vinegar, and brown sugar.  Stir until sugar is dissolved.  Season with salt and pepper, to taste.  Use to fill soft taco shells and top chalupa (recipe below).

For enchiladas, preheat oven to 350F.  Heat a small to medium-sized skillet (large enough to fit soft tortilla in) under high heat and add a thin later of vegetable oil, just enough to coat the pan.

Heat tortillas in oil, one at a time, for about 10-15 seconds, just on one side.  Transfer tortillas to a paper towel-lined plate.  This ensures the tortillas are easier to work with and fold tightly.

Grease a small (maybe 8 x 10) casserole dish.  One by one, place a good amount of both cheese in the center of each tortilla.  Roll up and place snuggly in casserole dish.  Top with salsa verde and any remaining cheeses.

Bake in oven for about 10 to 15 minutes, or until cheese is melted and starting to brown on top.  Broil for 1-2 minutes to crisp up even more, if desired.


To make chalupas, combine water and masa harina until dough forms.  Form dough into 4 patties, about 1/4 to 1/2 inch thick.

Heat about 1 inch of vegetable oil in a heavy bottomed pan under medium high to high heat.  You'll know when the oil is ready when a piece of dough sizzles when you place it in there.

Fry each chalupa for about 3-5 minutes (or until golden on both sides) and transfer to a paper towel-lined plate to dry.  Top chalupas with filling from above and sour cream.

No lettuce or tomatoes in the house = a not so colorful picture, but hey... it tasted pretty darn good!

So yeah, needless to say, this produces a lot of food.  So make sure you have company.  Or a large family.  Or a big appetite.

My verdict?  I think my "unauthentic" Mexican Combo #2 far-outweighed Fiesta Time's "authentic" Mexican Combo #2.  From now on, I'll stick to my around-town favorites like El Mundo, El Caporal, or El Torasco.  Do we see a trend here?  I don't know, but my hypothesis is that if it doesn't start with "El", it may not be all that. =)

Have a great Monday guys and I'll see you tomorrow!

Monday, December 13, 2010

Mushroom & Yellow Squash Enchiladas


Happy Monday!  And if you're in any snow-ridden areas, like we are, hope you're not snowed in (unless you want to be!)!    Thankfully, I'll be at home all day, and all day tomorrow, safe and warm... making duck confit - definitely excited about that.

How was everyone's weekend?  Ours was pretty relaxed, just went out to dinner on Friday (at a local joint, the Bard's Town, which was just so-so - slow service ruined it for me, but Andy didn't seem to be phased by that!).  Saturday we went out for some celebratory drinks with our friend's Ike and Becca (who just got engaged so congrats to them!).  And Sunday was just spent grocery shopping, baking cookies, and watching football (Go Eagles!). 

And last week, I experimented with a few vegetarian dishes for dinner, which mostly went over well with Andy.  (Trust me, he wasn't excited at first, but after putting the plates in front of him, he gladly dug in!).  By far, these enchiladas were the fave, so I thought I'd share them with you all!


Ingredients:
Adapted from Closet Cooking's recipe


2 tablespoons olive oil
1 onion, sliced thinly
8 oz. portobello mushrooms, sliced
1 lb. yellow squash, chopped
2 garlic cloves, chopped
3 thai chiles, chopped
1 teaspoon ground cumin
1 teaspoon oregano
1 cup salsa verde

5-6 small corn tortillas
1/2 cup shredded pepperjack cheese

1/2 cup shredded cheddar cheese

Preheat oven to 350 F.

Heat the olive oil in a large skillet under medium high heat.

Add the onions and cook until soft and translucent, about 5 minutes or so.  Then add the mushrooms and cook for about 10-15 minutes, or until they've softened, as well.

Add the yellow squash and cook until just tendder, about 4-5 minutes.  Then stir in the garlic, peppers, cumin, and oregano.  Cook for about a minute.

Remove from heat and mix in 1/2 cup of the salsa verde.

Spread 1/4 cup of the salsa verde over the bottom of a ceramic baking dish.

Carefully fill the corn tortillas with filling (I didn't do a good job of this, my tortillas kept breaking, but the cheese does a good job of covering up those imperfections!), and roll them up and place them in the baking dish with the seam on the bottom.

Pour the remaining 1/4 cup of salsa verde over the tortillas and sprinkle on the cheese.

Bake for about 20-25 minutes, or until the cheese and edges of the tortillas have started to brown.

Plate the enchiladas and dig in!


This dish packed some heat and definitely gave me the comfort that a good old meat enchilada would have!  It was like I didn't even miss the meat!  And Andy was fully impressed with the dish too!  My little carnivore ate a vegetarian dish!  Woohoo!  Enjoy guys!

Friday, August 13, 2010

Crabcake Quiche


One of my favorite appetizers to have are crabcakes. I mean, who doesn't like crabcakes? Weirdos. That's who. (No offense to you non-crabcake lovers out there). The crunchy, panko crusted outer edges, and the soft meaty crab... the flavors are just superb... when done correctly, of course.

I've also recently developed a lover for quiches. Cheese plus eggs. How can you go wrong there?

So, the genius inside of me decided one night... why not combine the two? Hell... I could be one to something here. Unless it's already been thought up... but as far as I know, I haven't seen or heard of anyone else making this. So, consider yourselves lucky, because this is a knockout dish perfect for breakfast, lunch, or dinner!


Ingredients:

2 cups flour
1/2 teaspoon salt
1 cup unsalted butter, softened, plus 3 tablespoons melted
8 oz. cream cheese, softened
8 oz. lump crab meat
1/2 cup panko breadcrumbs
1 small onion, chopped
1 green bell pepper, seeded and chopped
small handful parsley, chopped
1/2 teaspoon dry mustard
salt and pepper, to taste
1/2 teaspoon cayenne pepper
1/4 cup heavy whipping cream
4 eggs, beaten
1/2 cup cheddar cheese, shredded

I've been in love with this simple cream cheese pastry dough. It's uber easy and pairs perfectly with practically anything savory.

In a small bowl, combine the flour and salt. In a large bowl, beat the 1 cup of butter and cream cheese until fluffy, about 2-3 minutes. Slowly beat in flour mixture until dough starts to form.

Dive the dough in half and shape into 2 rounds. (You can store the other half in the freezer in a freezer bag for up to 1 month for another use, or another quiche!). Cover and refrigerate the dough round for about 1 hour, or until well chilled.

Meanwhile, in a medium bowl, combine the crabmeat, panko, onion, and bell pepper. Stir in parsley, mustard powder, salt, pepper, and cayenne pepper. Toss with melted 3 tablespoons of butter and heavy cream. Mix well and fold in eggs and cheese.

Roll out dough on a floured surface to about 1/8 inch thickness. Make large enough to fit a normal sized pie pan. Grease pie pan and preheat oven to 350F.

Set dough in pan and place pie weights or dry beans atop of dough. Bake for about 10 minutes, or until starting to brown.

Add crabmeat mixture and bake for about 25-30 minutes longer, or until filling is set. Let cool for about 5 minutes and serve!


I'm telling you, this was one of those light bulb moments like "why haven't I thought of this before?!" It was soooooo good. Happy weekend and enjoy guys!