Wednesday, August 31, 2011

Mixed Greens w/ Apples & Smoked Gouda


I know I've been posting a lot of simple salads over the past few months - but I can't help it!  I love lunchin' on salads!

One of my favorite additions to salads are julienned apples - Granny Smiths to be exact.  Raise your hand if you agree!  They just give a welcomed and refreshing sour bite in the midst of some semi-bitter greens.

Happy mid-week to ya guys and just remember - 2 more days and it's a 3 day weekend (for those of us in the US that is!).


Ingredients:


Mixed greens
1/2 cup Smoked gouda, cut into 1/2 inch cubes
Granny Smith apple, peeled and julienned
1/4 cup deli turkey, chopped

In a large bowl combine greens, gouda, apple, and turkey.  Serve plain or dressed with your favorite dressing!

Simple right?  Right. 


I promise I'll start posting "harder" recipes soon!  Stay tuned tomorrow for my review of our Danville, KY tasting and a meet-up with other KY Food Bloggers!  Have a great rest of your Wednesday guys!

Tuesday, August 30, 2011

Black Bean Salad


Hope everyone is having a good week so far!  I'm already ready for our three-day weekend!

I've got to head out to work tonight, but I just wanted to do a quick post first.

This black bean salad is quick, easy, and practically goes with any summer meal!  You could even eat it all by itself (I know, because I did for lunch a couple times!)

Ingredients:


1 15 oz. can seasoned black beans, drained
1 cucumber, peeled and diced

3 roma tomatoes, seeded and chopped
2 cloves garlic, minced
1/2 teaspoon dried parsley flakes
small handful fresh Basil, chopped
1 tablespoon Parmesan cheese, grated
1 tablespoon olive oil
3 tablespoons balsamic vinegar
salt and pepper, to taste


In a medium sized bowl, toss together black beans, cucumber, tomatoes, garlic, parsley, basil, parmesan cheese, olive oil, and balsamic vinegar.  Season with salt and pepper.

Let marinate in the fridge for at least 45 minutes for flavors to meld.  Serve as a side dish for practically anything!


Don't you just love easy, throw together dishes like this?  I know I do!  Have a great Tuesday guys!


Monday, August 29, 2011

Secret Recipe Club: Fish Tacos


I know what you're thinking.  I already had my turn.  I was in Group A that posted earlier this month for The Secret Recipe Club.  Now I'm just being greedy.

But no, I'm actually being helpful!  I got an e-mail at the beginning of the month, that somebody from Group C had backed out, leaving a blogger without a "Secret" partner.  And being that last month, I happened to be a blogger that had someone back out on me (and thank goodness Winnie from Healthy Green Kitchen stepped up to volunteer to do another post - she's awesome!), I knew I had to step up and pay it forward!

And it turns out I got one of my favorite blogs - Kelly from Eat Yourself Skinny!  Everything always looks good on Kelly's blog, whether it be her Grilled Chicken Thighs with Pineapple, Corn, and Bell Pepper Salsa or her Watermelon Martinis - there's something for everyone there.  And you know what the best part is?  Most, if not all, of Kelly's recipes are absolutely figure friendly and healthy for you!  You know how I know?  She includes all of the nutritional info with all of her posts, which is always helpful!

With so many choices, it was hard to pick what to make - but I eventually settled on her Sauteed Tilapia Tacos w/ Grilled Peppers & Onions.  Fish tacos are my absolute fave, and I believe it is essential that they grace everyone's table at least once during the summer!  I made a couple small changes, just based on things that I already had on hand - I used flounder as my fish and utilized my purple peppers from our CSA, as well as adding a little Asian flare with the Ginger Miso dressing (I'm obsessed right now!).

Ingredients:
Adapted from Eat Yourself Skinny's recipe


1 small onion, sliced
2 purple bell peppers, sliced
2 tablespoons olive oil
salt and pepper, to taste
2 large flounder fillets (about 1/2 lb.)
6 corn tortillas
Ginger Miso Dressing (I bought some from a local sushi joint - but you could easily make your own!)

Heat 1 tablespoon olive oil in a large skillet under medium high heat.  Add onions and bell pepper and cook until starting to soften, about 6-8 minutes.  Season with salt and pepper.  Remove from skillet and set aside.

Season flounder on both sides with salt and pepper.  Heat remaining tablespoon of olive oil in the same skillet used for onions and bell pepper (if needed) under medium high heat.  Add flounder and cook for about 3-4 minutes per side, or until fish is white throughout.

Place tortillas on a microwave-safe plate and cover with a semi-damp paper towel.  Microwave for about 15 seconds, or until warm.

Flake off the flounder and divide amongst the tortillas.  Top with onion and bell pepper mixture.  Then add a little bit of ginger miso dressing on top, if desired.  Fold up and enjoy!

These were seriously delicious!  And I felt good eating them!  Although, my changes probably made them a little less healthy than Kelly's.


And funny story about these tacos.  I had eaten 2 out of the 3 when I had to get up from the table and get something from another room.  When I came back, my last taco was gone.  I looked at Andy and said "where's my taco?!"  He shrugged his shoulders, and then we both saw Zappa (one of our dogs), licking his chops on his bed, and a little piece of corn tortilla by his paw - the dog stole my taco!  And apparently he liked it too!

Anyway, these were tasty, and I can't wait to try more goodies from Kelly's blog!

Want to join in all the fun?  To find out how, check out The Secret Recipe Club!


Friday, August 26, 2011

S'Mores Pie

Ahh sweet Friday. 

I always love when this part of the week comes.  Especially when we have a full weekend planned.  Well, half of a weekend, anyway.  Tomorrow is the annual Brew At The Zoo.

I did a review of last year's festivities and it was a blast... and this time Andy gets to join.  So it's bound to be tons of brilliant fun.  So stay tuned for that.

And yesterday, I drove down to Danville, KY.  I met up with a few other food bloggers from the state (including Mindy from The World In My Kitchen, Lori from Fake Food Free, Fiona from Crazy Englishwoman Cooks, Beth from The Goodness of the Garden, Rona from Savoring Kentucky, Deanna from Mirabelle Creations, and Carolyn & Erin from Bourbon & Beans).  More on that next week, of course!  But it was so fun to finally meet in person - everyone was so friendly and warm, just like they are on all of their blogs!

Anyway, let's talk about everyone's favorite campfire treat.  I'll be the first to tell you that I am not a camping person.  AT ALL.  Bugs.  Nature.  No running water.  Yeah... I can't handle that very well.  But s'mores.  Those I can do.  And thank goodness I don't have to be in the middle of a forest to indulge in them! 

But actual s'mores can be somewhat messy (but I'm sure that's half the fun, right?) - so as soon as I saw this neat little pie over at The Pastry Affair, I knew I had to try it.  Andy said this was THE best dessert I've made ever.  EVER.  Personally, I don't think so - it was really rich, but I think chocolate ice cream is rich, so don't take my word.  Take Andy's.  After all... he knows best.

Ingredients:
Adapted from The Pastry Affair's Recipe


Graham Cracker Crust

2 cups honey graham crackers, about one sleeve
8 tablespoons (1 stick) butter, melted
2 teaspoon cinnamon


Chocolate Filling
 
3/4 cup heavy cream
3/4 cup milk
6 ounces semisweet chocolate, chopped
4 ounces bittersweet chocolate, chopped
Pinch of salt
2 eggs, whisked
1 bag of large marshmallows

Chocolate sauce (I used a bottled kind, but you could easily make your own), optional

Preheat oven to 325 F.

In the bowl of a food processor, pulse the graham crackers until finely crumbled.

Add cinnamon and melted butter and pulse until combined and the mixture resembles wet sand. Press mixture into a 9 inch pie plate. Bake for 8-10 minutes, or until fragrant.

Keep oven running.

In a medium saucepan, whisk together cream and milk. Warm over medium-low heat. Add in chocolate and salt. Stir until chocolate has melted and is smooth. Slowly add whisked eggs and mix until smooth and slightly thickened.

Pour chocolate filling into baked pie crust. Bake for 30-35 minutes, or until chocolate filling is set and does not move when pie is lightly shaken. Remove from oven.

Cut marshmallows in half and place on top of the pie until covered.

Set oven to broil. Place pie under the broiler and lightly toast the marshmallows, about 2 minutes - but watch the marshmallows carefully because everybody's oven is different and you could go from toasted to crazy, nasty burned in a matter of seconds.

Drizzle with chocolate sauce, if desired.  Chill pie in the refrigerator to set for 2-3 hours.

Cut into slices and enjoy!


So yeah, I let Andy have half of the pie and took the other half to work.  Needless to say, it was a winner all around.  If you're a chocolate lover - you have got to try this!


Have a great weekend everybody!

Thursday, August 25, 2011

Zucchini Frittata


Good morning! 

I woke up with a killer cramp in my calf this morning, so I'm slowly limping around the house.  As time passes, it seems to be getting better... but it doesn't look like I'll be getting my run in today.  I figure I better let it rest up and I'll get back at it Saturday.

I'm pretty stoked today because I get to take a little roadtrip to Danville, KY to meet up with a few other Kentucky Food Bloggers.  We're doing a tasting of a few restaurants tonight and I'm really excited to actually meet these awesome bloggers in person.  I'll definitely post pictures and a review of the experience next week!

I made this frittata when we had tons of zucchini from our CSA.  It was quick, easy, and my only complaint... I used too big of a pan, so it looks rather thin (and more like an omelette) than an actual frittata.  Oh well, it still tasted mighty good!

Ingredients:


1 tablespoon olive oil
2 zucchini, chopped
salt and pepper, to taste
6 eggs
1 cup cheddar cheese, shredded
1/4 cup milk

In a medium skillet under medium high heat, add about 1 & 1/2 teaspoons olive oil.  Add zucchini and saute until starting to brown, about 5-7 minutes.  Season with salt and pepper.  Remove zucchini and set aside.

In a medium bowl, beat the eggs and milk together.  Season with salt and pepper.  Heat a non-stick skillet under medium low heat and add remaining 1 & 1/2 teaspoons of olive oil.  Coat pan with oil.

Pour the egg mixture into the pan and let cook until the egg starts to solidify, about 2-3 minutes.  Spread the zucchini over top of the eggs and top with cheddar cheese.  Cook for an additional 3 to 5 minutes, or until egg is cooked through and cheese is melted.

Slice and serve right away.

This was simple, delicious, and easy.  You could have it for breakfast, lunch, or dinner.  It's perfect for any time of day!  Feel free to swap out the ingredients for what you have, and add whatever you like!  Frittatas are versatile like that =)


Have a great Thursday guys!

Wednesday, August 24, 2011

Spicy Pickled Carrots & Asparagus


I've been dying to pickle something ever since the summer began.  Cucumbers, Okra, Radishes... you name it, I wanted to pickle it.  Did I ever get around to pickling those things?  Well, no.  Life got in the way.

But I did manage to do a quick pickle on some leftover carrots and asparagus that turned out great!  We used these on tacos, as accompaniment to salmon, and even ate them straight out of the jar.  Not bad for a first timer, if I do say so myself.


What's your favorite vegetable to pickle?

Ingredients:
Adapted from Apt. 2B Baking Co.'s Recipe


1 lb. carrots, peeled and julienned
about 10 asparagus spears, cut into 1 inch pieces
10 Thai chiles, split in half
1/2 cup sugar
1 teaspoon salt
1 & 1/4 cup rice wine vinegar
1 cup warm water

In a medium bowl, combine carrots, asparagus, 2 teaspoons of sugar, and salt.  Massage sugar and salt into vegetables until they because somewhat flexible.  Transfer to a colander and rinse with cold water.  Drain.

In another bowl, combine the remaining sugar, rice wine vinegar, and warm water.  Stir until sugar is dissolved. 

Tightly pack the drained carrots, asparagus, and chile peppers into pint-sized mason jars (I did 2 jam-packed jars).  Pour the vinegar mixture over the vegetables until about 1/2 inch from the top.  Seal jars and place in refrigerator overnight.

These were a quick pickle, so I'd say they would last no more than 3 weeks in the fridge.  Ours didn't last that long, since I pretty much served them with everything we ate!


I'm off to go play a night volleyball game and tomorrow I'm down for a road trip to Danville, KY where I'll be meeting up with a few other KY Food Bloggers.  Pictures to come!

Tuesday, August 23, 2011

Sausage & Peppers


Phew what a busy day it has been! 

I know it's crazy late, but you know me... had to get a post in.

After work today, I headed over to register for classes.  CULINARY SCHOOL CLASSES.  Oh yeah.  I don't think I've ever been so excited to receive a stack of textbooks and binders.  I think today it's really starting to sink in.  I'm actually going to culinary school.  I'm following a dream.  And it is awesome.

So now that I've gotten my excitement out of the way, let's talk food.

I recently received a package in the mail from the Foodbuzz Tastemaker's program to try a sample of an upcoming line of Birdseye Chef's Favorites.  They're a variety of side dishes that include Mushroom & Green Bean Risotto, Creamy Primavera Risotto, and Lightly Sauced Creamed Spinach. 


I paired the Mushroom & Green Bean Risotto with this sausage and peppers meal and it was okay.  It was a tad bit "mushroomy" for my taste - but I mean, it was Mushroom and Green Bean Risotto after all.  I tried the Creamy Primavera Risotto as well and I found it more appetizing.  My only real complaint was that the packaging said there were 2 servings per package.  Now, I don't know if Andy and I just expect big servings of things or what, but there was definitely only 1 feasible serving on the package.  But other than that, if you're looking for a quick side without the hours of labor - then this might be for you, so look out for it!

Now, these sausage and peppers are a different story.  Quick, easy, and tasty.  No complaints on this one!


Ingredients:

1 onion, chopped
1 purple bell pepper, sliced
1 jalapeño, seeded and chopped
1/4 cup diced tomatoes
1 cup mozzarella cheese, shredded
2 mild italian sausages, sliced
1 tablespoon olive oil
salt, to taste


Heat olive oil in a large skillet under medium to medium high heat.  Add onions, jalapeño, and bell pepper and sauté for about 5 minutes, or until starting to soften.  Season with salt.

Add sausage slices and cook until browned, about 5 to 7 minutes.

Stir in tomatoes and mozzarella cheese until heated through and cheese is melted.


This was definitely a winner in my book.  Almost doesn't even need a side dish accompanied with it.


Well, I'm off to bed.  Have an early morning at work again tomorrow!  See you all in the afternoon!


*I received a free sample of Birdseye Chef's Favorites through the Foodbuzz Tastemaker's Program.  All opinions shared in this post are my own.

Monday, August 22, 2011

Duck Breasts w/ Panzanella


Happy Monday everybody! 

How was your weekend?  Ours was pretty relaxed, nothing new right? 

We had our first Fantasy Football draft of the season (we're in 3 leagues!) yesterday and I ended up with a pretty solid team.  I'm just so happy that #1.  NFL Football is actually happening this year. & #2. That the season is actually here!  Sundays = Football in our house!  And I can't help but laugh when I think about when I first met Andy, he didn't like any sports whatsoever.  I guess we do rub off on eachother.

Anyway...

I usually don't post something I've made right away.  I usually wait a day or two most of the time.  I've just got tons of things in my Lightroom gallery that it's hard picking what to do next.  However, we had this for dinner last night, and it was so amazing that I couldn't wait to share it.  Seriously, if you like duck (it's probably my favorite protein) and want something special and elegant - this is it.  Trust me.

Ingredients:
Adapted from Food & Wine's recipe


2 boneless duck breasts
4 ears of corn
2 potatoes, scrubbed and diced
15 asparagus spears, chopped into 1 inch pieces
1/4 cup olive oil, plus extra for drizzling
4 slices of bacon, chopped
5 slices of bread (we used a local bakery's Cereal Loaf), cut into 1 inch cubes
salt and pepper, to taste
1 pint heirloom cherry tomatoes, halved
1 green onion, thinly sliced
1 teaspoon dried oregano
1/4 cup red wine vinegar

I'm so glad I decided to buy a whole duck instead of just the breasts.  It's a lot cheaper, plus I have the rest of the duck to use to make a confit (which is actually in the works as we speak! The house smells so good right now!).

Food & Wine recommends aging the breasts for 4 days - but I didn't have 4 days.  So I quickly aged the duck breasts for about 2 hours.  Just place the duck breasts in a glass dish, skin side up.  Season with salt and pepper and place in the fridge for at least 2 hours, and up to 7 days.

Preheat oven to 400 F.  Line up corn, asparagus, and potatoes on a baking sheet.  Drizzle with olive oil and season with salt and pepper.  Roast for about 30 minutes, or until potatoes are golden brown, stirring occasionally.  You'll want to flip around your corn every once in a while too.  Let vegetables cool slightly, then cut off kernels from corn cob.

While the vegetables are roasting, heat a large cast iron skillet under medium heat and add bacon.  Cook until bacon is crisp, about 5-7 minutes.  Remove with a slotted spoon and drain on paper towel-lined plate.

Add the bread cubes to the bacon fat (this was genius!) and coat well.  Transfer skillet to the oven (on a rack underneath the vegetables) and bake until crisp, about 13-15 minutes.  Season croutons with salt and pepper.

Heat a large skillet under medium high heat.  Add duck breasts, skin side down, and cook until skin is golden and crisp - about 12-14 minutes.  Turn duck over and cook until medium-rare (if you're not comfortable with that, cook it a little longer) about 4-6 minutes. 

Transfer duck to a cutting board and let rest for 5 minutes.  Slice thinly.

While the duck is resting, you can prepare your panzanella.  In a large bowl, combine the corn, potatoes, asparagus, bacon, croutons, tomatoes, scallions, and oregano.  Toss well. 

In a small bowl, combine the red wine vinegar and 1/4 cup olive oil.  Season dressing with salt and pepper and drizzle over vegetables and croutons in bowl.  Toss to mix well.

Divide the panzanella among plates and top with slices of duck. 


Seriously, this was absolutely amazing.  I think it took Andy all of 5 minutes to clear his plate.  He said it was so good he couldn't help but keep shoving it in his mouth.  Me, I took it slow.  So I could enjoy every bite because it was really the perfect meal! 

Have a great Monday guys!

Friday, August 19, 2011

Chef Salad w/ Honey Mustard Dressing


Boy am I glad it's Friday!  I don't really have big plans for the weekend (possibly the KY State Fair?), but the usual - relaxing. 

Andy is going to be out tonight for a bachelor party, so that leaves me to fend for myself tonight for dinner.  I work late, so I might just throw together some CSA vegetables and see what I come up with!

Salads are always my go-to lunch during the week, but every now and then you'll see them appear for dinner.  I made this a while back, but it's still been in the back of my mind because it was one of the best and most filling salads I've ever had.  The easy honey mustard dressing really makes this something special!

Ingredients:


Dressing:

1 tablespoon dijon mustard
1 tablespoon honey
3 tablespoons red wine vinegar
3 tablespoons olive oil
salt and pepper, to taste
1 tablespoon chopped dill

Salad:

Romaine Lettuce
1 Granny Smith apple, peeled and julienned
2 hard boiled eggs, chopped
3 pieces of bacon, cooked and chopped
shredded cheddar cheese
sliced turkey, chopped
1 carrot, peeled and chopped

I love the "Mason Jar" method when making salad dressings.  What is that?  Well, basically, throw in all of the ingredients for the dressing into a Mason Jar.  Shake until mixed.  Pour on top of salad.  Easy?  Hell yeah it is.

To assemble the salad, wash the lettuce and shake dry.  Divide among plates and top with apple, eggs, bacon, cheese, turkey, and carrots.  Drizzle on dressing. 

And bam!  Lunch or dinner is ready in no time. 

I don't usually like honey mustard as anything other than a dipping sauce for chicken, but on top of this salad... it was amazing.


What's your favorite salad & dressing combo?

Have a great weekend guys!

Thursday, August 18, 2011

Guest Post: Golden Beet Off!

Now... before you start laughing profusely at the name of this post - I didn't realize that it was a hidden innuendo at first.  But really, there's nothing else we could call it - so we kept it!

Oh, and who is this "we" I talk about?  Well me, of course.  And Kristy from Gastronomical Sovereignty!  Who is Kristy?  Well, for one, she's awesome!  She writes an amazing blog that talks about food, wine, and everything under the sun.  And not to mention she's absolutely gorgeous!

Kristy approached me not too long ago in an e-mail after noticing we both got our fair share of golden beets in our CSA shares.  So she came up with the fun idea of a little friendly competition.  A "Beet Off," if you will.  Yeah, the immature person in me just can't help but laugh at that name.  But I digress.

Anyway, of course I was game!  And we're leaving it up to you to decide who's is "better"!  Of course, in a perfect world, and in my own humble opinion, we both win.  But Kristy especially wins because she actually used golden beets!  I had used up all of mine by the time I got her e-mail, and for some reason I couldn't find any in town when I needed them!  So I picked up some red beets and ran with it.  Be sure to check out Kristy's blog today for my guest post, and to see what I came up with!  And don't forget to let us know which you like better - we definitely encourage you to get your beet-on and try the recipes out for yourself!

So now, without further ado (I know I've babbled on way too long), here's Kristy!


Hello lovely Peggy viewers! My name's Kristy and I live at Gastronomical Sovereignty - a space where I navigate and share my ethical adventures in culinary deliciousness... with wine, of course! 
 

After realizing Peggy and I shared a love affair with the golden beets that were coming in our CSA boxes, I was so very pumped when Peggy and I decided to exchange guest posts in a "Golden Beet Off". Your challenge, dear reader, is to try both and delve into the absolute deliciousness that are golden beets.


Beets to me are the spirit of the Earth. They embody the richness, the sweetness, and the dirtness of everything that is right with the world. Dirtness? Really? They do taste a bit like dirt. But in a good way. A seriously good way. And they really are low maintenance vegetables - before they are harvested and after! You don't even need to cook them! Just julienne and tuck into some goat cheese goodness! 

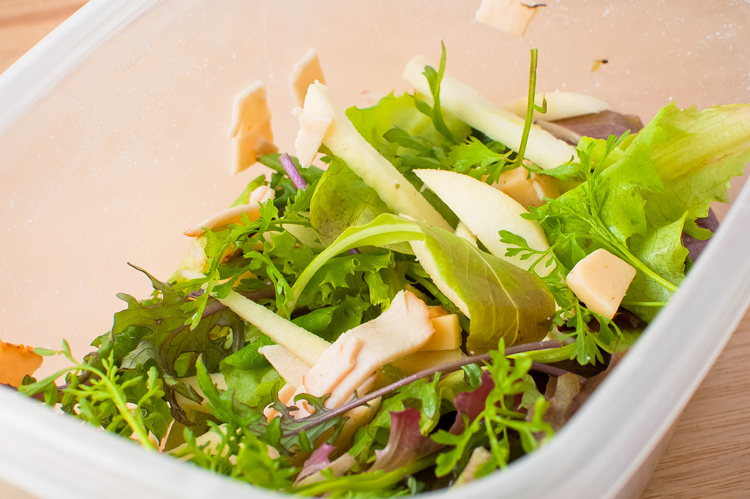
For today though, I decided to do something special with the little guys. Or gals, if you prefer. This recipe is simple, delicious, seasonal, local, small scale, organic perfection. It was so simple in fact, I asked my partner (John) if maybe it was too simple to be worthy as a guest post! However, after a few bites I was smitten - and I'm sure you will be too. All of the vegetables either came in our CSA or from our very own front yard garden. Serve as a vegetarian friendly main or a meat friendly side. The cooking time is minimal here so you can spend more time out on the deck (with a big fat glass of vino) and less time hovering over a hot stove in the middle of a balmy August, while the measurements are approximate. Add more or less of whatever you like - make it your own! It just doesn't get any fresher than this!

"Golden Beet Off" Quinoa Salad
feeds approximately 4 hungry people.


Ingredients for Salad:
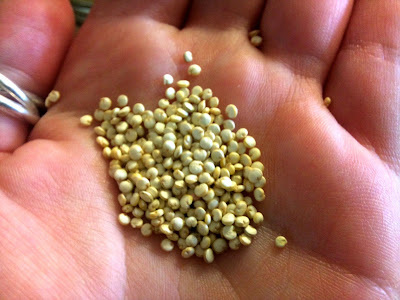
1 C Quinoa, soaked and rinsed.
10 Medium Sized Golden Beets, rinsed and dried.
4 Garlic Cloves, peeled.
1 Large Handful Sugar Snap Peas, strings removed.
2 Handfuls Fresh Arugula, washed. 
1 C Toasted Walnuts.
One Palm Fresh Goats Cheese.
Bunch of Fresh Herbs (i.e. Basil, Parsley, Chives).
1 Tbsp Ground Cumin.
Juice of Half a Lemon.
1 C Chicken Stock + 1 C Water.
Extra Virgin Olive Oil.
Kosher Salt & Fresh Cracked Black Pepper.

Ingredients for Dressing:

1 C Extra Virgin Olive Oil.
1/3 C Good Quality Balsamic Vinegar.
Juice of Half a Lemon.
1-2 Garlic Cloves, minced.
Kosher Salt & Fresh Cracked Black Pepper.

What to Do:

Pre-heat your oven to 400 degrees F. While it heats up, throw the beets, peeled garlic cloves, a generous helping of salt and pepper, and a few good glugs of olive oil into a large roasting pan. Toss well to combine. Cover. Roast for 30 - 45 minutes or until fork tender. 


Remove from the oven and allow to cool slightly. Cut off their bums and peel using your thumb and forefinger. But be gentle, new beets are very tender and if you push too hard you may mangle them - but whatevs, they'll still taste great! Besides, if the beets are still quite warm, they should peel easily. If not, use a pairing knife or potato peeler. Cut into halves and/or quarters and set aside. Discard the garlic - it will likely be burnt. It was more there to give an essence of garlic flavor rather than a punch in the face. Or, munch along as you prepare the rest of the meal.


While the beets are a'roastin, chuck all the dressing ingredients into a mason jar. Close and shake well. Season to taste. Set aside. If you don't have a mason jar, a whisk and bowl will work to the same effect.

While your beets cool, heat a medium sized sauce pan over high heat with the chicken stock, water, cumin, and the juice of half a lemon. Once it's at a rolling boil, toss in the quinoa, stir, and bring back to a boil. Cover and reduce the heat to low to simmer for 13 - 15 minutes. Remove from the heat and let stand for 10. Fluff with a fork.


Holy multi-tasking batman! As the quinoa sits, heat only about a tbsp of oil in a small pan and quickly flash sautee the peas for about 2 minutes. Remove from the heat. 


Assembly time!


Throw all of the salad ingredients into a bowl and toss well. Drizzle in about half the dressing and stir to combine. You may want to add more salt and pepper at this time - it's up to you. Taste it. Yum? No? Add more salt and pepper and/or dressing to suit your liking.


Serve with some toasted flatbread (I usually pour some of the dressing onto a side plate to dip it in).

Eat. A lot. It's healthy and super duper good for you. 


There it is! I hope you like it!! I sure do! Come by and say hello over at my site (http://gastronomicalsovereignty.blogspot.com) if you have the time - Peggy will be there. Food block party pot luck?! Heck yes! Nice to meet all of you - hope to be seeing you soon!

 
Kristy Gardner
Lascivious lover of good, "ethical" food & wine.

http://gastronomicalsovereignty.blogspot.com

Email: onewomansadventures@gmail.com
Facebook: Gastronomical Sovereignty
Twitter: gsonblogger


Wednesday, August 17, 2011

Stewed Tomatoes & Okra


Okra is one of those things that I don't cook enough of.  Actually... this would be the first dish I ever used okra in.  And after eating it for lunch for the past two days, I think I can pat myself on the back because it was pretty darn good!  And it definitely won't be the last time I make it either!

What's your favorite way to use okra?

Ingredients:


15 oz. can of fire roasted diced tomatoes
2 cups sliced okra
salt and pepper, to taste
2 cups cooked rice

Place the okra in a medium-sized pot and add enough water to cover the okra.  Add diced tomatoes and bring mixture to a boil.  Lower heat to a simmer and cook for about 30 minutes, or until okra is softened and the majority of liquid is gone.


I've noticed that different people like okra at different consistencies.  I'm not a fan of crunchy okra, so I cooked my okra until it took on the texture it has in gumbo - soft, but not gummy.


When the liquid is almost gone, add in the rice and mix well.  Season with salt and pepper.  Serve hot.


This was really easy and tasty!  I mean, 4 ingredients, how can you beat that?!  This would make a great side, or even a delicious vegetarian lunch or dinner.


I know I'm my usual late self, but like I said last week - sporting events prevail! 


And as of tomorrow's post, I won't have the usual CSA round-up - but something really special is lined up - so be sure to check back!


Tuesday, August 16, 2011

Tapioca & Cantaloupe


I've had a clumsy start to the week.  I'm not even usually a clumsy person, but this week, it's like accident after accident seems to be happening!

Sunday, while making dinner, I made the stupidest mistake ever.  I had cooked some salmon in the oven (in an oven-proof skillet).  After removing the skillet from the oven, getting side-tracked into a conversation of some sort with Andy, I go to grab the skillet.  Yeah, I think I may have yelled out some expletives with that one.  A quick lathering of aloe did the trick, and my hand seems to be just fine - so no worries!

And then yesterday, I was being extra productive and tried to tackle the cleaning of my pantry.  I bumped into a shelf and knocked over a jar of tomato sauce (which happened to be $8!).  So yeah, jar broke, tomato sauce everywhere.

Just not my week, I tell ya.

So times like these, simple things make me happy.  Like this tapioca, cantaloupe, and coconut milk dessert.  It's very reminiscent of something my mom used to make when I was a kid.  I'm pretty sure she put sweet potatoes and bananas in hers, but when I asked her how she made it - she couldn't even remember that it was something she made.  But I swear she made something like this!

I was on a search for tapioca pearls a couple weeks ago, and being too lazy to drive to the other side of the city to an Asian Market, I settled on granules from Whole Foods - there was an empty spot where the pearls were that said "discontinued item".  I guess tapioca isn't that popular anymore!

Ingredients:
Adapted from New Asian Cuisine's Recipe


1 & 1/2 cups water
3/4 cup sugar
2/3 cup tapioca granules (or pearls)
1/2 cup whole milk
1 cup unsweetened coconut milk
2 cups cantaloupe, cubed

In a medium saucepan, bring the water and sugar to a boil.  Once boiling, turn the heat down to low and stir in the whole milk.  Return mixture to a boil, then turn off the heat.  Stir in the coconut milk.  Let mixture cool to room temperature and refrigerate for at least 2 hours.

Cook the tapioca according to the package directions and then drain.  Stir tapioca into coconut milk mixture.  Add in chopped cantaloupe.


When I was a kid, I remember this being a little bit thicker, but this version was more like a soup.  I actually liked it this way.  It was the perfect treat to sit on the back porch and read a book with.  I even brought some into work for some co-workers to try and they said it reminded them of pina coladas!  If only I lived near a beach!


Oh, and one other note.  Through the Foodbuzz Tastemaker's Program, I was able to make a Kodak Photo Book.  I got the e-mail right after we received our engagement pictures back and thought it would be the perfect way to get them printed!  I made a little "story book" of Andy and I!


 Making the photobook couldn't have been easier!  Most of the photos I uploaded from Facebook, and then the engagement pictures I just uploaded straight from my computer!  It didn't take long either.

And the process is pretty self-explanatory, as well.  The Kodak website pretty much walks you through the whole thing.  It even lets you know if the picture you chose isn't of good enough resolution for print - nothing more frustrating than seeing a picture that looks perfect on a computer screen, but then crappy when you print it off!

So as my readers, Kodak is offering you 40% off the cost of a Medium Hard Cover Or Large Photobook.  Just check out the website here!

Have a great rest of your day guys!

*As part of the Foodbuzz Tastemaker's Program, I was given the opportunity to make a free Kodak Photobook.

Monday, August 15, 2011

Secret Recipe Club: Peanut Butter Crunch Brownies


Happy Monday!  It's that time again, Secret Recipe Club reveal!

What is Secret Recipe Club?  Well, it's the brainchild of Amanda from Amanda's Cookin'.  You are assigned a "secret" blog to cook one dish from and post on the given reveal date.

I love how the group has just grown so much since I first joined!  This will be my third SRC post and definitely not my last!  I just love discovering new blogs to ogle over!

This month, I received Edesia's Notebook.  This blog was new to me, but as soon as I was assigned this blog, I knew I would be a regular!  With things like Slow Cooker Garlic Soy Drumsticks to Ginger Scallion Rice, it was hard to choose!  It all looks delicious!

Andy was being especially good, so I thought I'd treat him to a special treat.  I picked Edesia's Peanut Butter Crunch Brownies a.k.a. Better Than Crack Brownies.  I mean, chocolate & Reese Cups?  Two of Andy's favorite things combined into one stellar brownie.  And it couldn't be easier to put together either!  Let's get to it!

Ingredients:
Adapted from Edesia's Notebook's recipe


1 box brownie mix (I used Ghirardelli Dark Chocolate)
1 egg
1/4 cup water
1/2 cup vegetable oil
about 8 Reese's peanut butter cups, roughly chopped
1/2 cup salted peanuts, chopped
1 cup semi-sweet chocolate chips
1 tbsp butter
1 & 1/2 cups creamy peanut butter (I used PB & Co.'s Bees Knees)
1 & 1/2 cups Rice Krispies cereal

Make the brownies as directed on the box in a 9x13” pan.  Bake for 20 to 25 minutes.

Remove the brownies from the oven and top with the peanut butter cups and peanuts. Place the brownies back into the oven and bake an additional 6 to 10 minutes or until a toothpick can be inserted and comes out clean. Remove the brownies from the oven.

In a microwave safe dish, melt the chocolate chips, butter, and peanut butter for about 45 seconds. Stir until smooth.  Then stir in the Rice Krispies.


Pour the Rice Krispies mixture over the brownies and let cool. Refrigerate for at least two hours until serving.  This was definitely the hardest part because I totally wanted to dig straight into them!  But trust me, well worth the wait!

Okay, these were seriously one of the best brownies ever.  I even tried to take some leftovers to work and Andy practically held them hostage.  So yeah, they were THAT good.

I had a friend over for dinner that night and gave him a couple to take home for his roommates - Andy didn't see me do this and when he noticed a couple brownie slices were missing, he definitely interrogated me until I confessed.  I didn't know he was keeping track - duly noted for next time.

I got a text later on in the week that read "umm, (roommate's name) says that brownie was better than crack".  I don't want to know how they know this, but hey - I take it as a compliment.

So yeah, trust me - you want to make yourself a batch of these babies.  But I can't promise that you'll want to share them.  Ask Andy.


Friday, August 12, 2011

Sweet Chili Green Beans


Happy Friday everybody!

I'm so ready for the weekend (I've got to work Saturday morning, but it ain't no thang!).  We've got a couples bridal shower to go to, so that should be fun.  And then some major relaxation is in the works for Sunday and Monday!

Now I used to think I had a favorite green bean recipe.  I mean, it's all the rage on Food52, too.  But my friends, I think there's a new contender in town.  This was so good I ate it with my hands.  Yeah... that good.  So good, if I ever do open up my own restaurant - this will be an appetizer for sure.

Ingredients:


1 lb. green beans, trimmed
4 strips of bacon, chopped
1 onion, thinly sliced
1-inch piece of ginger, peeled and minced
3 thai chiles, minced
2 tablespoons sweet chili sauce
1 teaspoon fish sauce
1/4 c. water
sesame oil, optional

toasted black sesame seeds, optional

Bring a large pot of salted water to a boil.  Add green beans and cook for about 3 minutes, or until beans are a bright green.  Drain and set aside.

In a large skillet over medium to medium high heat, cook the bacon until crisp, about 5 to 8 minutes.  Drain on paper towel-lined plate and set aside.  Remove all but 1 tablespoon of the bacon grease from the pan and add onion.  Cook until softened, about 3 to 5 minutes.

Stir in the ginger, Thai chiles, sweet chili sauce, fish sauce, and water.  Add green beans and toss to coat. Saute for 5-10 minutes, until water evaporates, the sauce thickens, and the beans become tender.

Stir in bacon and sprinkle with sesame oil and sesame seeds.


Seriously, I couldn't stop eating this.  I'd walk by and grab a bean.  Then come back 2 seconds later and grab another couple.  Be prepared to have an addiction to these!

Have a great weekend guys!