Monday, April 9, 2012
Secret Recipe Club: French Dip Sandwiches
My most exciting time of the month - Secret Recipe Club reveal day!
I had the pleasure to be assigned the blog Mom's Fridge. I've been to Barb's blog before and everything on there is a hodge-podge of comfort food and foods that make you think of home (if you're not already there, of course). You can find things like Ranch-Style Macaroni Salad to Caramel Filled Snickerdoodles. She's got it all!
One thing that stuck out in my head were these French Dip Sandwiches, though. I've just been so busy at work and school that I hardly ever have time to cook anything. So what better way to feel like I slaved over a meal than to throw it all in the crockpot! It's my favorite time-saving kitchen device. So without further delay, let's get to it!
Ingredients:
Adapted from Mom's Fridge
3 lb. bottom-round roast
2 cups beef stock
1 small onion, diced
salt and pepper, to taste
1 teaspoon garlic powder
1 tablespoon olive oil
2 baguettes, toasted
Heat a large skillet under medium high heat and add olive oil. Season meat on both sides with salt and pepper. Sear the meat in the skillet on all sides until you get a nice golden brown.
Place the seared meat into the crockpot and add beef stock, onion, and garlic powder.
Place on HIGH for 1 hour and then reduce heat to LOW for at least 6 hours.
Shred the meat and place on toasted baguettes. Serve with strained broth from crockpot. Dip to your heart's content!
This was a wonderful meal! I just loved dipping the sandwiches into the flavorful broth. This was definitely an easy winner for us!
Want to join the SRC? Check out the site now! And don't forget to check out Mom's Fridge too!
Saturday, April 7, 2012
Blitz Puff Pastry
Hey guys! Those of you who follow me on Facebook probably already know that I'm in a Baking lab this quarter so there's gonna be baking-related posts for a bit! Are you excited?! Alright!
Now this also means that we're going to be using scaled measurements here - I gotta do it in school, so might as well make it a habit of doing in real life! So bust out your digital scales!
Hope you guys are doing well, we're just finalizing all the little details for the wedding (22 days!!) and staying busy - as always.
So puff pastry. Tons of layers, tons of butter. But who has time to fold and turn, fold and turn, fold and turn?! That's where blitz puff pastry comes in. It doesn't quite rise as much as regular puff pastry, but it rises enough for presentation, and it's a whole lot quicker! Let's get to it!
Ingredients:
8 oz. bread flour
8 oz. pastry flour
1 lb. unsalted butter, softened
1/4 oz. salt
8 oz. cold water
My digital's batteries went out when I started the recipe so I had to bust out my spring scale. Definitely not nearly as accurate as a digital or a balance scale - but you have to be resourceful with what you have!
So now we sift our flours and salt together. You could definitely use a mesh strainer or an actual drum sifter, but our chef said in a pinch, a whisk works just fine too.
Just for fun, let's discuss the 3 purposes of sifting (because let's be honest, when a recipe tells me to sift, I rarely do, based on the shear fact that I'm lazy and don't want to go through all the trouble. Guess this Baking class is going to change my evil ways!)
#1 - to remove lumps - makes sense
#2 - to incorporate air - this is the big one, ever notice that after you sift dry ingredients they seem to amount to more mass? It's the air!
#3 - to create a homogenous mass - another big point. You want your individual ingredients to lose their sole identities to become one happy family.
And now we're gonna cut in our butter. You want to "crush" the fat into the flour, not "squeeze" it in there. Picture yourself making the "I want money" gesture, not the "I want to choke the chicken". You know what I mean?
Once you have the majority of the big chunks of butter incorporated into the flour, make a well in the center and pour in your cold water.
Use a bowl scraper or wooden spoon to incorporate the dough into the center until it forms a unified mass. Gentle now... we don't want to over work the dough. On a lightly floured surface, form the dough into a rectangle loaf.
Roll dough into a rectangle that is about 1/4 to 1/8 inch thick.
Fold the left and right sides toward the center, leaving a finger-width gap in between.
Then fold the sides together.
Then roll out into a rectangle about 1/4 to 1/8 thick again, and repeat entire process 2 more times.
Wrap up your finished pastry and place in the freezer for at least 8 hours or overnight.
And bam, you'll have puff pastry to use at your own discretion! Next couple of posts, I'll show you what I did with mine!
Hope you all have a great Easter holiday, if you're celebrating. Otherwise, just have a good rest of the weekend =)
Now this also means that we're going to be using scaled measurements here - I gotta do it in school, so might as well make it a habit of doing in real life! So bust out your digital scales!
Hope you guys are doing well, we're just finalizing all the little details for the wedding (22 days!!) and staying busy - as always.
So puff pastry. Tons of layers, tons of butter. But who has time to fold and turn, fold and turn, fold and turn?! That's where blitz puff pastry comes in. It doesn't quite rise as much as regular puff pastry, but it rises enough for presentation, and it's a whole lot quicker! Let's get to it!
Ingredients:
8 oz. bread flour
8 oz. pastry flour
1 lb. unsalted butter, softened
1/4 oz. salt
8 oz. cold water
My digital's batteries went out when I started the recipe so I had to bust out my spring scale. Definitely not nearly as accurate as a digital or a balance scale - but you have to be resourceful with what you have!
So now we sift our flours and salt together. You could definitely use a mesh strainer or an actual drum sifter, but our chef said in a pinch, a whisk works just fine too.
Just for fun, let's discuss the 3 purposes of sifting (because let's be honest, when a recipe tells me to sift, I rarely do, based on the shear fact that I'm lazy and don't want to go through all the trouble. Guess this Baking class is going to change my evil ways!)
#1 - to remove lumps - makes sense
#2 - to incorporate air - this is the big one, ever notice that after you sift dry ingredients they seem to amount to more mass? It's the air!
#3 - to create a homogenous mass - another big point. You want your individual ingredients to lose their sole identities to become one happy family.
And now we're gonna cut in our butter. You want to "crush" the fat into the flour, not "squeeze" it in there. Picture yourself making the "I want money" gesture, not the "I want to choke the chicken". You know what I mean?
![]() |
The whisk doesn't belong in there (can you tell I'm rusty? Or rushed.) |
Once you have the majority of the big chunks of butter incorporated into the flour, make a well in the center and pour in your cold water.
Use a bowl scraper or wooden spoon to incorporate the dough into the center until it forms a unified mass. Gentle now... we don't want to over work the dough. On a lightly floured surface, form the dough into a rectangle loaf.
Roll dough into a rectangle that is about 1/4 to 1/8 inch thick.
Fold the left and right sides toward the center, leaving a finger-width gap in between.
Then fold the sides together.
Then roll out into a rectangle about 1/4 to 1/8 thick again, and repeat entire process 2 more times.
Wrap up your finished pastry and place in the freezer for at least 8 hours or overnight.
And bam, you'll have puff pastry to use at your own discretion! Next couple of posts, I'll show you what I did with mine!
Hope you all have a great Easter holiday, if you're celebrating. Otherwise, just have a good rest of the weekend =)
Friday, March 23, 2012
How-To: Boil Water
Hello again! Remember me? It just seems like my breaks between posts keep getting longer and longer, don't they? But I promise I'll always return!
Anyway, we're down to 36 days until the wedding! Can you freakin' believe it?! Just yesterday, I could remember it being ages away (like 2 years away!). And it's coming up quickly. We pretty much have everything taken care of, just need to make the final payments on some things and we'll be good to go.
I'm in between quarters at school (next quarter starts Monday - BAKING! - so expect a bunch of baked goods in the near future) and catching up on some spring cleaning, so I haven't done much cooking - especially since life is crazy busy! I know the title of this post may deter some of you, I mean, hell... shouldn't we all know how to boil water? Believe it or not, I've actually seen a lot of people that do this incorrectly! Take my lovely other half, for instance. I find him putting the pasta in the pot, covering it with water, and THEN putting it on the stove. I can even admit that I'm guilty of this every now and then. A lot of people think that it's faster to do it that way, but honestly - it just wastes more time!
So this isn't necessarily a "how-to" per se, but more of a post of tips. So let's get to it!
1. Starting with cold water, put enough water into a pot to cover whatever you'll end up boiling (i.e. pasta). Bring water to a boil over high heat. Add salt to season.
2. Add your desired food to the water (in my case, pasta). The temperature will drop when you add the food, so you'll want to keep the heat on high to bring it back to a boil. Then reduce the temperature, as needed, just to maintain a boil.
3. Cook the food until it reaches your desired texture/doneness.
You want to serve boiled food right away, unless you plan on shocking it after (placing in ice water).
I know this may have seemed like a pointless post to some of you, but I've come to learn that the little things are what make your meals amazing. Whether it be properly heating up a saute pan, bringing water to a full boil, or even something as simple as adding a pinch more salt to something. It's the little things that don't get the credit, but it's also the little things that bring something from "meh" to "wow, what's your secret?!"
Hope everyone has a great weekend! I've got to work at the restaurant tonight, but I've got the whole weekend off. Andy and I are planning on being lazy - but that never works out! See you guys in a few days =)
Friday, March 9, 2012
Country Ham & Manchego-Stuffed Chicken Breasts
Howdy!
The wedding countdown is on. Less than 2 months away, we're starting to chip at what we have left to do bit by bit. The past week or so, my engagement ring has been at the jeweler's in order to get the bands molded. I almost feel naked without it! Like men are just gawking at me like I'm a single woman. Hehe, I'm pretty vain aren't I?
The end of this quarter of Culinary School is almost upon us. And I'm definitely ready for the break. The middle of the month is also my last day at my day job at the pharmacy. I've worked there for 7 years and it'll be hard to say good-bye. But I know I've been lifelong friends and it won't be good-bye to those people. But it also marks the day I'll be moving on. Really getting on. I'll be able to work at the restaurant more, especially since I'll be switching to Day-time classes for the next quarter. Nights and weekends were alright, but I'd be there double the time. Day-time classes allow me to finished faster (and cook more!) - as well as being able to work at the restaurant more often.
But all in all, everything is great - except for the fact I've cut myself twice in the past two weeks. Once on my pinky (sliced the sucker right open) while cleaning my knife - and the second time was just this past Sunday at work - with a bread knife. Not pretty. And by the time I went to the Immediate Care Center (my stubborn ass went the next day instead of right after work), it was too late to get stitched up. So I'll just have to suffer with the battle wounds for now.
Anyway, this is an easy weeknight dinner that's tasty and quick! Let's get at it!
Ingredients:
2 chicken breasts, boneless and skinless
2 pieces of country ham
2 slices of manchego cheese (or cheese of your choice)
1/4 cup flour
salt and pepper, to taste
2 tablespoons grapeseed oil (or olive oil)
Preheat oven to 375 F.
Wrap your chicken breasts loosely in plastic wrap. You want it loose enough that they'll be able to comfortably expand, but not too loose that they're "expand" in little pieces all over your kitchen when you smack the crap out of them.
Take a meat mallet or bottom side of a pan and get to smacking. Flatten the breasts to about 1/4 to 1/2 inch thickness.
Remove plastic wrap from chicken breasts.
Place a piece of country ham on chicken breast.
Place a piece of manchego cheese on top of country ham.
Using butcher's twine or toothpicks (these are more ideal), wrap the chicken breast around the ham and cheese. If I had toothpicks handy, I would have used those, but the twine sufficed.
Place the flour in a shallow dish. Season with salt and pepper. Dredge the chicken in the flour, shaking off any excess flour.
Heat the oil in an oven-proof skillet under medium high heat. Place the chicken in the pan, seam-side up. Cook chicken until you get a nice golden crust, about 3-4 minutes. Flip chicken over and cook for an additional minute.
Transfer chicken to the oven to finish, about 10 minutes or until internal temperature reaches 165F.
Serve chicken with barbecue sauce (or sauce of your choice) and side of your choice. We paired this with macaroni and cheese for a nice comforting meal!
Monday, March 5, 2012
Secret Recipe Club: Cranberry Salsa Dip
It's my favorite time of the month! Secret Recipe Club Reveal time!
This month, I was assigned the blog I Was Born To Cook. I wasn't familiar with this blog, but I found tons of great things - and Melissa is definitely true to her blog's name - she was born to cook!
I've been on a cranberry kick lately (I know they're a tad out of season, but hey, I've never been one to let that stop me from feeding a craving!). This Cranberry Salsa was the perfect lazy Sunday snack. Both Andy and I found ourselves going back for more - this definitely will be on rotation when we have a snack craving!
The only change I made was that I used dried cranberries, and just rehydrated them in some apple juice for about 30 minutes. Also I omitted the sugar and the jalapenos (mostly because I forgot that they were on the ingredient list, but the dip tasted just fine without them, although next time I definitely will not be forgetting the jalapeno - we could all use a little spice in our lives!)
Ingredients:
Adapted from I Was Born To Cook's Recipe
1 cup dried cranberries
1 & 1/2 cups apple juice
juice from 1 lime
1/4 cup cilantro
2 green onions, chopped
salt, to taste
8 oz. cream cheese, softened
Place the cranberries in a small bowl and pour apple juice over top. Let sit for at least 30 minutes to rehydrate. Drain.
In a blender (I've been experimenting with my new Magic Bullet - it actually is pretty awesome), combine the cranberries, lime, cilantro, green onions, and salt. Puree until you reach your desired consistency.
Place the cream cheese on the center of a plate. Spread the cranberry mixture over top and serve with crackers. Prepare to get your snack on!
Like I said, this was an awesome dip, just different enough to make you say "Wow!" I'll definitely be checking out Melissa's blog from now on because she's always coming up with tasty eats!
Want to join the Secret Recipe Club? Check out the website now! Be paired off with another "Secret" blogger and enjoy the fun of seeing someone recreate a recipe of yours as well! All the cool kids are doing it =)
Friday, February 17, 2012
Crab-Stuffed Salmon w/ Corn Red Pepper Relish, Garlic Mashed Potatoes, & Lemon-Thyme Beurre Blanc
So maybe that title could have been a little bit shorter, eh? I just wanted to make sure I had your attention!
This was, by far, one of the best meals that has ever been cooked in this household. Andy DEVOURED this plate. Seriously, I've never seen such a constant smile on his face after eating a meal. You just know it's gotta be a winner then!
Before we get into anything... how are you guys?! I know I'm sporadic in my posts, but I try to do one at least every other week. Things are just getting crazier and crazier! School, work, school. And this week I helped make hors d'oeuvres for a fundraiser that the restaurant on campus is holding tonight. I made some sweet potato biscuits and sandwiched in between them are some fig preserves, country ham, and manchego cheese. DELICIOUS. Hopefully they'll be a hit tonight!
Anyway, let's get to some salmon. Don't be weary about the seemingly long list of ingredients. Everything comes together quite quickly (less than 45 minutes) if you have everything prepped and ready when you need it!
Salmon:
2 - 8 oz. salmon fillets
1 cup lump crab meat
3 garlic cloves, minced
2 tablespoons fresh parsley, minced
juice from 1 lemon
salt and pepper, to taste
Corn-Red Pepper Relish:
1 red bell pepper, seeded and julienned
1 tablespoon olive oil
1 cup fresh or frozen corn (I used shoepeg because Andy loves shoepeg, but sweet yellow would be great too)
2 scallions, thinly sliced
2 garlic cloves, minced
juice from 1 lemon
1 tablespoon honey
2 tablespoon fresh parsley, minced
Garlic Mashed Potatoes:
5 medium-sized yukon gold potatoes, peeled and diced
1/4 cup garlic cloves, peeled
salt and pepper, to taste
1/4 cup heavy cream
1/8 cup sour cream
3 tablespoons unsalted butter
Lemon-Thyme Beurre Blanc:
1/2 cup white wine
1 small shallot, minced
3 sprigs fresh thyme
juice from 1 lemon
8 tablespoons cold unsalted butter, cut into tablespoon pieces
salt, to taste
Like I said, don't be scared! Everything is super easy, and you don't necessary have to have all the components - but I promise you, if you do... it'll be one hell of a knock out dinner if you're trying to impress someone special!
So first, let's prep the crab stuffing. Super easy. In a medium bowl, combine the crab meat, parsley, lemon juice, and garlic. Season with salt to taste, and bam. You've got crab stuffing.
Now let's stuff out salmon. But first we have to cut a slit down the middle of each fillet. You don't want to go all the way through, maybe leave anywhere between 1/4 to 1/2 inch on the bottom.
Place about 1/2 cup of the stuffing in the slit (and on top of the salmon).
Place in a container and cover with plastic wrap. Place in the fridge until ready to use.
Now we can make our mashed potatoes and relish at the same time. (But for ease, I'll describe each one separately).
Preheat oven to 375 F.
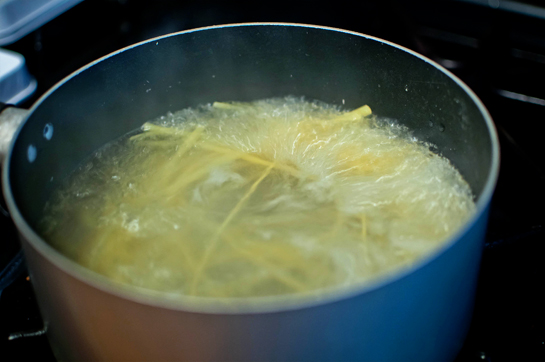
Place the potatoes in a medium pot and cover with water. Bring to a boil and cook until tender, about 10-15 minutes.
Place the garlic in a small roasting dish and toss in olive oil. Season with a little bit of salt. Roast in the oven for about 20-25 minutes, or until garlic is golden and soft. Let cool.
Drain the potatoes and add roasted garlic, sour cream, butter, and heavy cream. Mash until you've reached your desired consistency. Season with salt and pepper, to taste.
For the relish, add a little bit of olive oil to a large saute pan and heat under medium high heat.
Add corn and scallions, cook for about 2-3 minutes.
Then add red bell pepper and garlic. Cook until pepper is slightly softened, but still has a bit of a bite, about 2-3 minutes.
Turn off heat and stir in parsley.
Place mixture in a medium bowl and add in lemon juice and honey. Season with salt and pepper, to taste.
Now we can make our sauce while the salmon is cooking (hope your oven is still at 375!)
Place the salmon on a baking sheet and bake for about 18-20 minutes, or until at your desired doneness.
In a medium sauce pan, add shallots, thyme sprigs, and white wine. Place under medium high heat and reduce wine by about two-thirds.
When wine is reduced, slowly add in one or two pats of butter at a time, whisking constantly to form an emulsion. Don't add any more butter until the last bit of butter is almost emulsified. Continue adding butter until all is incorporated.
Whisk in lemon juice and season with salt, to taste. Strain mixture through a fine mesh strainer. (A great video on a beurre blanc is this one - so versatile, add whatever aromatics/flavors you desire)
To plate your final dish, first make sure all of your components are warm. If you did this all at once, everything should still be okay (if not, nuke it in the microwave for 30 seconds and you're good to go!).
Place about 1/2 cup of mashed potatoes on the center of the plate, slightly flatten out. Place salmon on top, slightly to the right or left of center (in other words, not exactly in the center, hehe). Place a small handful of the relish next to the salmon and drizzle the beurre blanc around the plate and a little bit on top of the salmon, as well. And voila... a plate designed to impress and satisfy any seafood-hungry stomach!
Hope you guys have a great weekend and see you soon =)
Monday, February 6, 2012
Secret Recipe Club: Kale Chips/Fries
It's been a bit since I've done a Secret Recipe Club (the club took the month of January off), but it's one of my favorite things to do! And my most consistent post =)
Of course, being as busy as I am, I had to pick something easy, quick, and tasty! So after perusing the blog Cook Book of Trial and Error, it was definitely a hard choice! There were so many tasty and quick options, but I figured I could pick something I could serve at my Superbowl party, as well!
These Kale Chips/Fries were a healthy option among all the calorie-laden foods was a welcome surprise to guests. I found myself snacking on these quite a bit last night!
Ingredients:
Adapted from Cook Book of Trial and Error's recipe
1 bunch of kale, stems removed
1 tablespoon grapeseed oil
Steak seasoning, to taste
My only changes were to use grapeseed oil (I've been using it as a replacement for olive oil lately and I love the cleaner taste!) and to use steak seasoning for an added punch!
Preheat oven to 350 F.
Line a baking sheet with parchment paper and spread kale in an even layer. You may even want to divide it into two sheets like I did (it was a huge bunch of kale).
Bake in oven for about 10 to 15 minutes, or until chips are nice and crisp.
Season additionally, if desired.
It's always fun to do the Secret Recipe Club! Want to join? Visit the SRC website now to find out how!
Subscribe to:
Posts (Atom)