Pages

Wednesday, December 14, 2011

Rice Pilaf


Hey guys!  Hope everyone is doing well.  I know I've still been a busy bee, but after Friday, I'll have a little bit more time on my hands because it's my last final of the quarter.  So I'll have a two week break before having to go at it all over again.

And I tell ya, it's going to be a much needed break.  I might even find myself sleeping more (right now I'm averaging about 5 hours a night, if I'm lucky!).

Anyway, I thought I'd post an easy side dish that any one can make.  It's a versatile dish where you can really add practically anything to, and keeps really well if you have leftovers.

Ingredients:

1 oz. clarified butter
2 oz. onion, small diced
1 oz. celery, small diced
1 oz. carrot, small diced
1 cup white rice
2 cups stock (chicken, beef, fish, vegetable - I happened to only have beef in the fridge so I used that)
1/2 bay leaf
salt and pepper, to taste

our mise en place

Heat a medium saucepan under medium high heat and add your butter.  When your butter is heated up, add your vegetables and sweat (cook without browning) them, about 3-5 minutes.


Once the vegetables are slightly softened, add the rice.  Stir until lightly toasted, about 1-2 minutes.


Then slowly incorporate your stock of choice.


Then add your half of a bay leaf.


Bring mixture to a boil.


Then lower to a simmer and cover. 


Let cook for about 20-25 minutes, or until about 95% of stock is absorbed into rice.


Serve as is or use as a side dish for a main course.  We ended up sauteing a few shrimp, putting them on top of the pilaf, and calling it dinner!

Hope everyone is doing well and surviving the holiday season (once again, I've completed all of my Christmas shopping online, avoiding the malls like the plague!). 

Until next time...

Monday, December 12, 2011

The Great Food Blogger Cookie Swap: Corn Cookies

Sorry for the horrible picture, didn't dawn on me to take pictures with my actual camera, and not my phone!
This year, I was part of something amazing.  The Great Food Blogger Cookie Swap!  Hundreds of other bloggers joined in all of the fun and cookies were sent all over the country.  It was so amazing to find a couple boxes on my doorstep when I came home from work of a variety of different cookies!  And it was even better to discover new blogs in the process! 

I received Dark & Stormy Cookies from Kathy Can Cook, Toffee Cookies from Anna from Girls Can Tell, and Lime Cookies from Creative Crops.  I'd never been do any of those blogs before, but I'm now a regular because they're all so sweet and have great blogs!

It was definitely hard to choose a cookie to send to my lucky recipients as well.  I didn't want to send a "normal" cookie, but something different.  So I turned to one of my favorite cookbooks of the moment - Momofuku Milk Bar by Christina Tosi.  I made the Corn Cookies, which are my absolute favorite out of everything I've made out of the book so far.  They're different, like a cross between a butter and a sugar cookie, with that slight hint of corn in the background.  Definitely amazing.


Ingredients:
From Momofuku Milk Bar by Christina Tosi

2 sticks of butter, at room temperature
1 & 1/2 cups sugar
1 egg
1 & 1/3 cups flour
1/4 cup corn flour
2/3 cup freeze-dried corn powder 
3/4 teaspoon baking powder
1/4 teaspoon baking soda
1 & 1/2 teaspoons kosher salt

Combine the butter and sugar in a large bowl and beat for 2 to 3 minutes.  Add the egg and beat for an additional 7 to 8 minutes.

Add flour, corn flour, corn powder, baking powder, baking soda, and salt.  Mix until dough just comes together, no more than 1 minute.

Portion the dough into 1 inch diameter balls and place onto a parchment paper lined baking sheet.  Wrap with plastic and refrigerate for at least 1 hour.

Heat oven to 350F.

Arrange the chilled dough 4 inches apart on a parchment paper lined baking sheet.  Bake for 18 minutes, or until faintly browned on the edges and bright yellow in the center.

Cool the cookies completely on the sheet pans and store in an airtight container for 5 days at room temperature, or in the freezer for up to 1 month.

I hope my lucky recipients enjoyed their cookies as much as we did!

And I can't wait for this fun event to happen next year too!

Monday, December 5, 2011

Secret Recipe Club: Fall-Inspired Chicken Salad


It's that time of the month.  Secret Recipe Club reveal day!  (It's basically the only day I can consistently keep up with this blog, too!)

I was real excited this month because I got Isabelle from Crumb: A Food Blog.  I've been reading her blog for quite a while, even when it was still called Good Food, Good Wine, and a Bad Girl.  She always has interesting blog posts - and there's always a point where I leave with my mouth watering.  You know that's a good sign!

As always, it's hard to pick what recipe to choose, but since Andy and I are on a bit of a healthy-eating food kick right now, I picked one of Isabelle's delicious looking salads - The Fall-Inspired Grilled Chicken Salad.  Isabelle had a fancy Cuisinart Griddler to do her grilling for her, but since I don't have one of those, and refuse to bust out the George Foreman - I simply sauteed my chicken breasts over the stove.  Besides that minor detail, I pretty much stuck to the recipe as is because it was just that good!

Ingredients:
Adapted Recipe from Crumb

1 large chicken breast, butterflied
2 tablespoons cajun seasoning (I made my own mix from this recipe)
1/4 cup olive oil
2 tablespoons apple cider vinegar
2 tablespoons maple syrup
2 teaspoons Dijon mustard
2 teaspoons spicy brown mustard
1 small shallot, minced
1 garlic clove, minced
salt and pepper, to taste
mixed salad greens
1 Granny Smith apple, cored and sliced
1/4 cup mixed fruit and nut trail mix

Season each side of the chicken breast with the cajun seasoning mix.

Heat a large saute pan under medium high heat and add about a tablespoon of olive oil.  Add chicken breast and cook for about 4-5 minutes, or until browned.  Flip over and cook an additional 4-5 minutes, or until cooked thoroughly.  Set chicken aside on cutting board to rest.

Make vinaigrette by combining olive oil, apple cider vinegar, maple syrup, Dijon mustard, spicy brown mustard, shallot, and garlic in a small bowl.  Whisk until mixture is emulsified (no separation of acid and oil).  Season with salt and pepper, to taste.

In a large bowl, toss the greens with about 2 tablespoons of the vinaigrette and divide among two plates.  Top greens with trail mix and sliced apples.  Then top with sliced chicken breasts.  Serve with additional dressing, if desired.

Like I said, this was an amazing meal - and I would expect nothing less from something on Isabelle's blog!  Feel like being adventurous?  Join the SRC today!


Sunday, November 27, 2011

Beef Tenderloin w/ Espagnole Sauce


Wow... I've been M.I.A. for quite some time!  It's been even busier around here, and it's hard to even wrap my head around what I've gotten myself into!

The restaurant is going quite well.  I was on the pantry line (salads & desserts, a few cold and hot appetizers) for a bit of time, and last week I started training at the grill station.  I'm having tons of fun, and learning a hell of a lot!  Which is the whole point of all of this!

Did everyone (who celebrated) have a good Thanksgiving?!  I know we did.  My whole family went down to Andy's family's Thanksgiving dinner on Thursday and it went quite well.  I'm glad that our families could get together on a day like that and get along so well.

Anyway, I know everyone still might have turkey on the brain, but in honor of me training on the grill station, I thought a nice, juicy steak felt like just the thing to post.  Hopefully I'll be back sooner next time, instead of going on a three week hiatus, but who knows what the next week of life has in store for me!

Ingredients:


2 6-8 oz. cuts of beef tenderloin
2 sweet potatoes, peeled and cut medium dice
spinach, optional
Espagnole sauce, recipe here
salt and pepper, to taste
Olive oil, for rubbing and drizzling

Preheat oven to 400 F.

Rub each steak with about a tablespoon of olive oil.  Season your steaks with salt and pepper, on both sides.

Place the sweet potatoes on a baking sheet.  Drizzle with about 1-2 tablespoons of olive oil and season with salt and pepper.  Toss well and spread into one even layer.  Bake for about 25-30 minutes, or until golden brown, stirring occasionally.

Heat a large skillet under medium high heat.  Add about a tablespoon of olive oil to the pan and heat until shimmering. 

Add steaks and cook until desired doneness (I think a medium rare is perfect, about 6-8 minutes per side, depending on the thickness of your cut).  Let rest on a cutting board for about 5 minutes.

Warm up Espagnole Sauce, if needed.

To plate, place a good amount of sweet potatoes on the center of the plate.  Top with steak and drizzle Espagnole sauce over top.  Serve with a side salad of spinach and some fresh bread.

This brings "meat & potatoes" to a whole new level.  It was a simple enough dinner to be ready in no time, but also one that is sure to impress dinner guests, as well!


And on a side note, a reader had asked in the comment section of the Espagnole Sauce recipe about a proper way to make a Demi Glace. 

By definition, a demi glace is half brown sauce (Espagnole), half brown stock (beef stock), reduced by half.  Easy enough right?  So for 1 cup of demi glace, use 1/2 cup of Espagnole Sauce, 1/2 cup of beef stock... bring to a boil, then let reduce until the whole mixture is 1/2 cup, or until desires consistency.

Hope to see you guys sooner than later!  And thanks for sticking around with me =)

Monday, November 7, 2011

Secret Recipe Club: Creamy Mac n' Cheese


With all of the craziness of my schedule, it's nice to still be able to do Secret Recipe Club.  To not think about school, or work, or anything.  Anything except exploring another blogger's site and making something delicious!

This was just the case with my assignment this month.  I got to explore Crystal from Mrs. Happy Homemaker's blog and was definitely impressed!  I found meals that were just the epitome of comfort foods and lots of things that made me smile.  It was a hard decision, with things like Deviled Egg Spiders to Apple Cinnamon Rolls with Caramel Cream Cheese Icing!  She even has updates on good deals and coupons, as well as DIY craft ideas (quite kid friendly!).  There's lots to explore over there, and I could definitely get lost for hours on her site.

Ultimately, I chose something that has always been comforting to me - Mac n' cheese.  Crystal's quest for the ultimate mac had me quite intrigued and I decided to give it a try (especially since we just learned about bechamel and this had a bechamel base!).  So I used what I had on hand - I replaced the 3 cups of cheddar with a nice block of gouda and gave it a little kick with some cayenne because I dig a spicy mac!

Ingredients:
Adapted from Mrs. Happy Homemaker's Recipe

1 lb. fusilli pasta
1 oz. flour
1 oz. unsalted butter, melted
1/4 teaspoon mustard powder
1/2 teaspoon hot Spanish paprika
1/4 teaspoon nutmeg

1/4 teaspoon cayenne pepper
3 cups milk (I used 2% so it took a little longer to thicken)
3 cups gouda, shredded
6 oz cream cheese, room temperature
1/2 cup garlic bread crumbs

1 cup grated sharp cheddar for topping
3 tablespoons grated Parmesan cheese

Boil pasta according to package directions. Drain.

Preheat oven to broil.
 

Meanwhile, in a large, nonstick pot over medium high heat, add butter.  Let it warm up and then whisk in flour, paprika, mustard powder, cayenne, and nutmeg.  Cook for 1-2 minutes until it starts to turn a pale white.  You've got the start of a white roux (except it'll be a tad red because of the paprika and the cayenne)!

Slowly add little increments of the milk so the roux doesn't get lumpy, and once you have a smooth mixture, add the rest of the milk.  Bring mixture to a simmer, whisking constantly. Cook until thick enough to coat the back of a wooden spoon. Remove from heat and whisk in cream cheese and the gouda. It will melt without being on the burner.

Mix cooked pasta with sauce and place into a greased baking dish. Top with the shredded cheddar cheese, breadcrumbs and parmesan. Broil until brown and bubbly, about 2-3 minutes.


This was some great mac!  It was definitely creamy and full of tons of flavor.  I'll be making this again, that's for sure!  Hope everyone has a great start to their week - I know I did!


Wednesday, November 2, 2011

Espagnole Sauce

It's been a bit hasn't it?!  I've been running around like a mad woman.  I'm surprised I'm even able to stand right now, let alone stay awake long enough to type this.  I've got long days, getting up at 5 am and working and then turning around and going to school at night (or going to the restaurant to work job #2!).  But success doesn't come easy.  It's a long, hard road.  But winning the lottery would help out just a little bit... anybody willing to share the winning numbers?  I'll split it with ya!

Anyway, we've been learning about mother sauces in my Theory class.  What are the mother sauces, you ask?  Well, there are 5 of them.  And they're pretty much the base for hundreds of other sauces.  They include Espagnole (which I'm going to show you today!), Veloute, Bechamel, Tomato, and Hollandaise.

Espagnole (pronounced es-pan-yole) is also called "brown sauce," but if you want to stick to being fancy, we can continue calling it Espagnole.  It's pretty simple and is basically a gravy.  So when we know the basics, we can improvise and add other ingredients to make even fancier-named sauces - but we'll get into that later on.  Let's get saucin'.


Ingredients:

1 oz. clarified butter
1 oz. flour
2 oz. onion, minced or brunois (a knife cut that is a 1/8" perfect cube)
1 oz. carrot, minced or brunois
1 oz. celery, minced or brunois
1 teaspoon tomato puree (good ol' ketchup works fine here!)
2 cups beef/veal stock
salt and pepper, to taste

Now, first thing's first.  We start this sauce with a roux.  You know fat + flour = roux.  But wait!  You'll want a digital scale (or old fashioned kitchen scale) for this, because a proper roux is equal parts fat (in this case, clarified butter) and flour, by weight.  This way, enough butter can absorb and take in enough flour to properly thicken.

And another thing about a roux.  There are 3 stages of a roux.  White. Blonde. And brown.  Each stage depends on how long you cook the roux for.  Obviously, we're making "brown sauce" so we want a brown roux.  One key thing about the color of a roux.  The darker the roux, the less thickening power it has.  So basically, it'll just take a little bit longer for your sauce to thicken up if you're going with a dark sauce!

Okay, so I'll stop babbling school talk.

Heat a medium saucepan under moderate heat and add your butter.


Let the butter warm up in the pan for just a minute, then add your flour.


Stir the flour until it's incorporated with the butter.  You'll want to heat your roux until it's almost the color of peanut butter.


Then you'll want to add your onions, carrots, and celery.


Give it a good stir to incorporate the vegetables in with the roux.


Cook the mixture until your vegetables start to caramelize, about 3-5 minutes.  Then add your tomato puree, aka ketchup.


Give it a good stir to incorporate the ketchup into the vegetable/roux mixture.


Then slowly add in your cold beef stock, while stirring.  You want to do it slowly so that you don't get any lumps.


Once you have all your stock in the saucepan, bring mixture to a boil for about 3-5 minutes.  This is to ensure that you cook out your starch in your flour.


Let simmer for about 10-15 minutes, until mixture is thickened enough to coat the back of a wooden spoon.

If you can make a line on the back of your spoon and the top doesn't move, you know you've got the right thickness!
Then you'll want to strain your mixture.


And season it to taste with salt and pepper.


And voila!  You have espagnole sauce.  You can use it as is and put it on steaks, or as a gravy for mashed potatoes.  Or you can use it as a base for other sauces like a Perigueux (just add demiglace and truffles!), or a Cherveuil (just add demiglace, red wine, and a dash of cayenne).  The possibilities are really endless! 

Hopefully I'll get some time to post within a couple of days to show you what I did with my espagnole sauce - because it sure was delicious!  Have a great week guys!

Friday, October 28, 2011

How-To: Dice an Onion

So I asked if you guys wanted some knife skills posts and there was a resounding yes!  I'm glad you guys are excited - because I love having an excuse to bust out my knife set!

Anyway, this may seem like a roll-your-eyes kind of post because I'm sure many of you know how to cut up an onion.  But if maybe you're like me (before culinary school), you may just roughly chop and not try to get it too precise.  I've noticed that since I've been in school (5 weeks already and I feel like I've learned such a vast array of tasks!), I find myself wanting perfect and symmetric everything.  It's getting to be a little OCD almost.

So I chose to show how to dice up an onion because I practically use an onion for almost every dish I cook.  It's crazy when you think about it, you know?  So we'll ease into something easy, and then I'm open to taking suggestions for future knife-cut how to's (anything in particular you guys want to learn how to do?  If I don't already know how to do it, we'll learn together!).

You won't need anything fancy.  Just an onion, a (really sharp) chef's knife, and a cutting board.


Honestly, you want to have a really sharp knife.  You're more apt to cut yourself with a dull knife than a sharp one.  So invest in a whetstone if you don't already have one (they average about $10 and last a really long time, so there's no reason to not have one).

And another thing, don't "saw" at anything.  You want to strive for one fluid motion through whatever you're cutting.  No back and forth action. 

So you'll want to take your whole onion and before you peel it, cut it in half, from the root to the top.  Then peel your onion.  Set the onion flat and make a diagonal cut to trim off the top. 


So now you're left with the top (which you can just pitch) and the rest of the onion. 


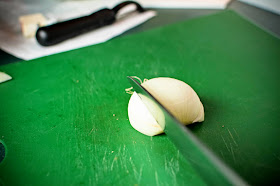
You'll want to put the heel of your palm on the top of the onion (or make a fist and put the tops of your knuckles on the top of the onion) to hold it in place.  Starting with the bottom edge of your knife, you want to make one fluid horizontal slice (about 1/4 inch from the bottom of the onion), pulling the knife closer to you as you cut and ending just before the root - no sawing motions, so this is why it's very important you have a really sharp knife! You want to keep your onion in tact, so make sure not to cut through the root! 

You'll just want to slide your knife through, and if you don't make it close enough to the root, it's okay - no biggie
Then you'll go up about 1/4 inch from your first cut and make another horizontal cut the same way.


Depending on how big your onion half is, you might be able to get one or two more 1/4 inch-spaced horizontal slices.  I think I did one more with this one.

Next you'll want to turn the onion 90 degrees (so that the root end is at the north end).  Then you'll make a vertical cut (about 1/4 inch from the left or right, it doesn't matter which end you start).  Remember, you don't want to go all the way through, cut before the root so your onion still stays in tact.


If you want, you can hold the sides of the onion together so it's easier to cut, just watch your fingers and be careful!  Space the vertical cuts about 1/4 inch apart (we're going for consistency here, right?)  I think I got about 5 or 6 vertical cuts.


After you make your vertical cuts, you'll want to turn the onion back 90 degrees (whether you're left or right handed, it doesn't matter, my root end was to the right because I'm left handed).

The key to an even chop is to have a stable, sharp knife.  Make one fluid cut.  No sawing.  I know I've said that a million times, but seriously.  Having my chef say it over and over made a difference with me and a lot of the other of the students.  I used to be a "sawer".  I'll admit it.  But I can't go cutting anything like that any more, regardless of what it is!

Anyway, make sure the tip of your knife is on the cutting board (in front of the onion, and just bring your knife down to make a vertical cut - 1/4 inch spacing!).

Stragglers are okay - no biggie
Continue to make 1/4 inch-spaced vertical cuts until you get to the root.

Don't hold the onion or knife like I did (I have no idea why I'm doing that lol) - you're apt to cut yourself
And voila - you've small diced (1/4 x 1/4 x 1/4) an onion.  Of course, an onion is round and layered and you can't really get a perfect 1/4 inch perfect cube, but it's close enough! 


I'll hopefully pop in during the weekend (can't make promises!), but if not, we've got Espagnole sauce next sometime next week!  And if you have any knife cuts you want to learn - let me know and I'll try to feature them next!

Have a great weekend guys =)

Friday, October 21, 2011

Fried Chicken & Waffles

I've always been intrigued by fried chicken and waffles.  I know it's wildly popular down South, but after doing a quick poll amongst co-workers, 90% of them looked at me like I was crazy, having never heard of such a blasphemous thing.

But I tell you what.  It's far from blasphemous.  It's the perfect combination of salty and sweet.  Breakfast and dinner wrapped into one.  And you better bet your ass that if I ever open up a restaurant one day, it'll be on the menu.  This was awesome.  And is the perfect use for the remaining parts of your broken down chicken.

Ingredients:

Fried Chicken:

2 lb. Mixture of chicken parts - thighs, drumsticks, wings, tenderloins, drummettes
2 cups buttermilk
1/2 cup flour
1/2 cup cornstarch
1/2 teaspoon cayenne pepper
1/2 teaspoon garlic powder
1/2 teaspoon onion powder
1 teaspoon italian seasoning 
Vegetable shortening, for frying

Waffles:


1 cup whole wheat flour
1 & 1/2 teaspoons baking powder
pinch of salt
1 & 1/2 tablespoons sugar
1 egg
1 cup milk
2 tablespoons unsalted butter, melted
1 teaspoon vanilla extract
maple syrup, optional (but not really, it's necessary, hehe)

Place the chicken pieces in a large plastic Ziploc bag and cover with the buttermilk.  Seal bag and refrigerate for at least 4 hours.  This will help to tenderize the chicken.

Remove chicken from bag and pat dry with paper towels.  Set aside.

In a large cast iron skillet, heat about 1 cup of vegetable shortening.  You want to get about an inch or so layer once it's melted (or at least be able to cover the chicken pieces by half).  Heat until between 325 - 375 F. 

In a medium shallow dish, combine the flour, cornstarch, cayenne pepper, garlic powder, onion powder, and Italian seasoning. 

Dredge each piece of chicken in the flour mixture and shake off any excess. 

Working in batches (I did about 4-5 pieces per batch), fry the chicken until cooked throughout, about 4-7 minutes per side (depending on the type of pieces you used, some cook faster than others).

While the chicken is frying, you can prepare your waffles.

In a medium bowl, combine flour, baking powder, salt, and sugar.  In a small bowl, whisk together the egg, milk, and vanilla until combined.  Combine the dry ingredients with the wet ingredients.  Then whisk in the melted butter until just incorporated.


Grease your waffle maker with non-stick spray or butter and add about 1/2 cup of batter per waffle.  Cook per machine instructions and waffles are browned and crisp.

Serve fried chicken atop one large waffle and drizzle maple syrup around waffle.  Enjoy absolute bliss.

If you've never heard of chicken and waffles, I highly recommend you try this very soon.  You won't be sorry.


Have a great weekend guys!  That's it (for now) with the chicken posts - I used the carcass for a stock, Alton Brown's recipe.  I'll have a knife cut how-to up next and then we've got Espagnole Sauce (a mother sauce that's the base for fancy sauces like a Bordelaise, Chasseur, Chateaubriand, Cherveuil, Madeira, Marchand de vin, Perigueux, Piquant, Poivrade, and Robert).  So lot's of learning opportunities to come - for both of us!

Wednesday, October 19, 2011

Buffalo Chicken Breast Sandwiches


One of the first things we ended up making in class were Buffalo Chicken Sandwiches.  I guess they want to start us off with something easy before working our way up to something more skillful.

I didn't mind because buffalo chicken sandwiches are actually one of my favorites. 

So the first installment of "What to do with your broken down chicken" is making use of the chicken breasts.  A simple sandwich that is as easy to put together as it is to eat!

Ingredients:

2 chicken breasts, skin removed
1 tablespoon olive oil
lettuce
1/4 cup of your favorite hot sauce (I used Frank's Wing Sauce - it's thicker and coats the chicken perfectly)
bacon
2 whole wheat buns
salt and pepper, to taste

Heat a large skillet under medium high heat and add oil.  Season chicken breasts with salt and pepper on both sides.  When oil is shimmering, add chicken to pan.


When the bottom side is a nice golden brown (about 4-6 minutes), flip the breast over.


Finish cooking the chicken until white throughout, an additional 5-7 minutes.  Transfer chicken breasts to a plate and let rest.

Assemble your sandwiches by placing lettuce on the bottom half of the bun.


Then you'll want to place your hot sauce in a medium stainless steel bowl.  Add chicken breasts, one at a time, swirling them around to coat well with sauce - kind of like you're saucin' some wings, ya know?


Then place your sauced chicken breast on top of the lettuce.


Then add a little bacon if you're feelin' frisky.


And close that sucker up with the top bun, and voila!  A buffalo chicken sandwich that'll be gone in less time than it took to put together!


Serve with fries if you'd like (I got to practice my battonet knife cuts in making them so I was all about it - speaking of, would you guys like some how-to knife cut posts?) 

Next up we've got a sweet and salty treat to use up the other edible parts of our chicken (those of you who are friends with me on Facebook probably have an idea of what's to come!).  Have a great Wednesday guys!